The Case Details tab provides an at-a-glance view of essential information about the injured party and the case. You can use this tab to add and edit a variety of data points and comments about the case.
NOTE: The SimplyConvert help documentation assumes that the client and the injured party are the same person. However, if the injured party is deceased, incapacitated, or otherwise unable to represent themselves, they may be represented by an authorized personal representative, such as someone with Power of Attorney. In such cases, the authorized representative should be identified as the client on the Contact Info tab, and the injured party should be identified as such on the Case Details tab.
Take the following steps to open the Case Details tab and edit its information:
- Open the Cases page.
- Filter the client list as needed, as described in Using Filters to View Your Cases.
- Find the case you’re looking for and click its row in the case list. The case opens and the case information tabs appear on the left.
- Click the Case Details tab (Figure 1). Initially, the tab contains only the information that the prospective client provided during case intake—for example, when answering questions for the SimplyConvert chatbot or your firm’s intake staff. You can add or edit information directly in any of the fields.
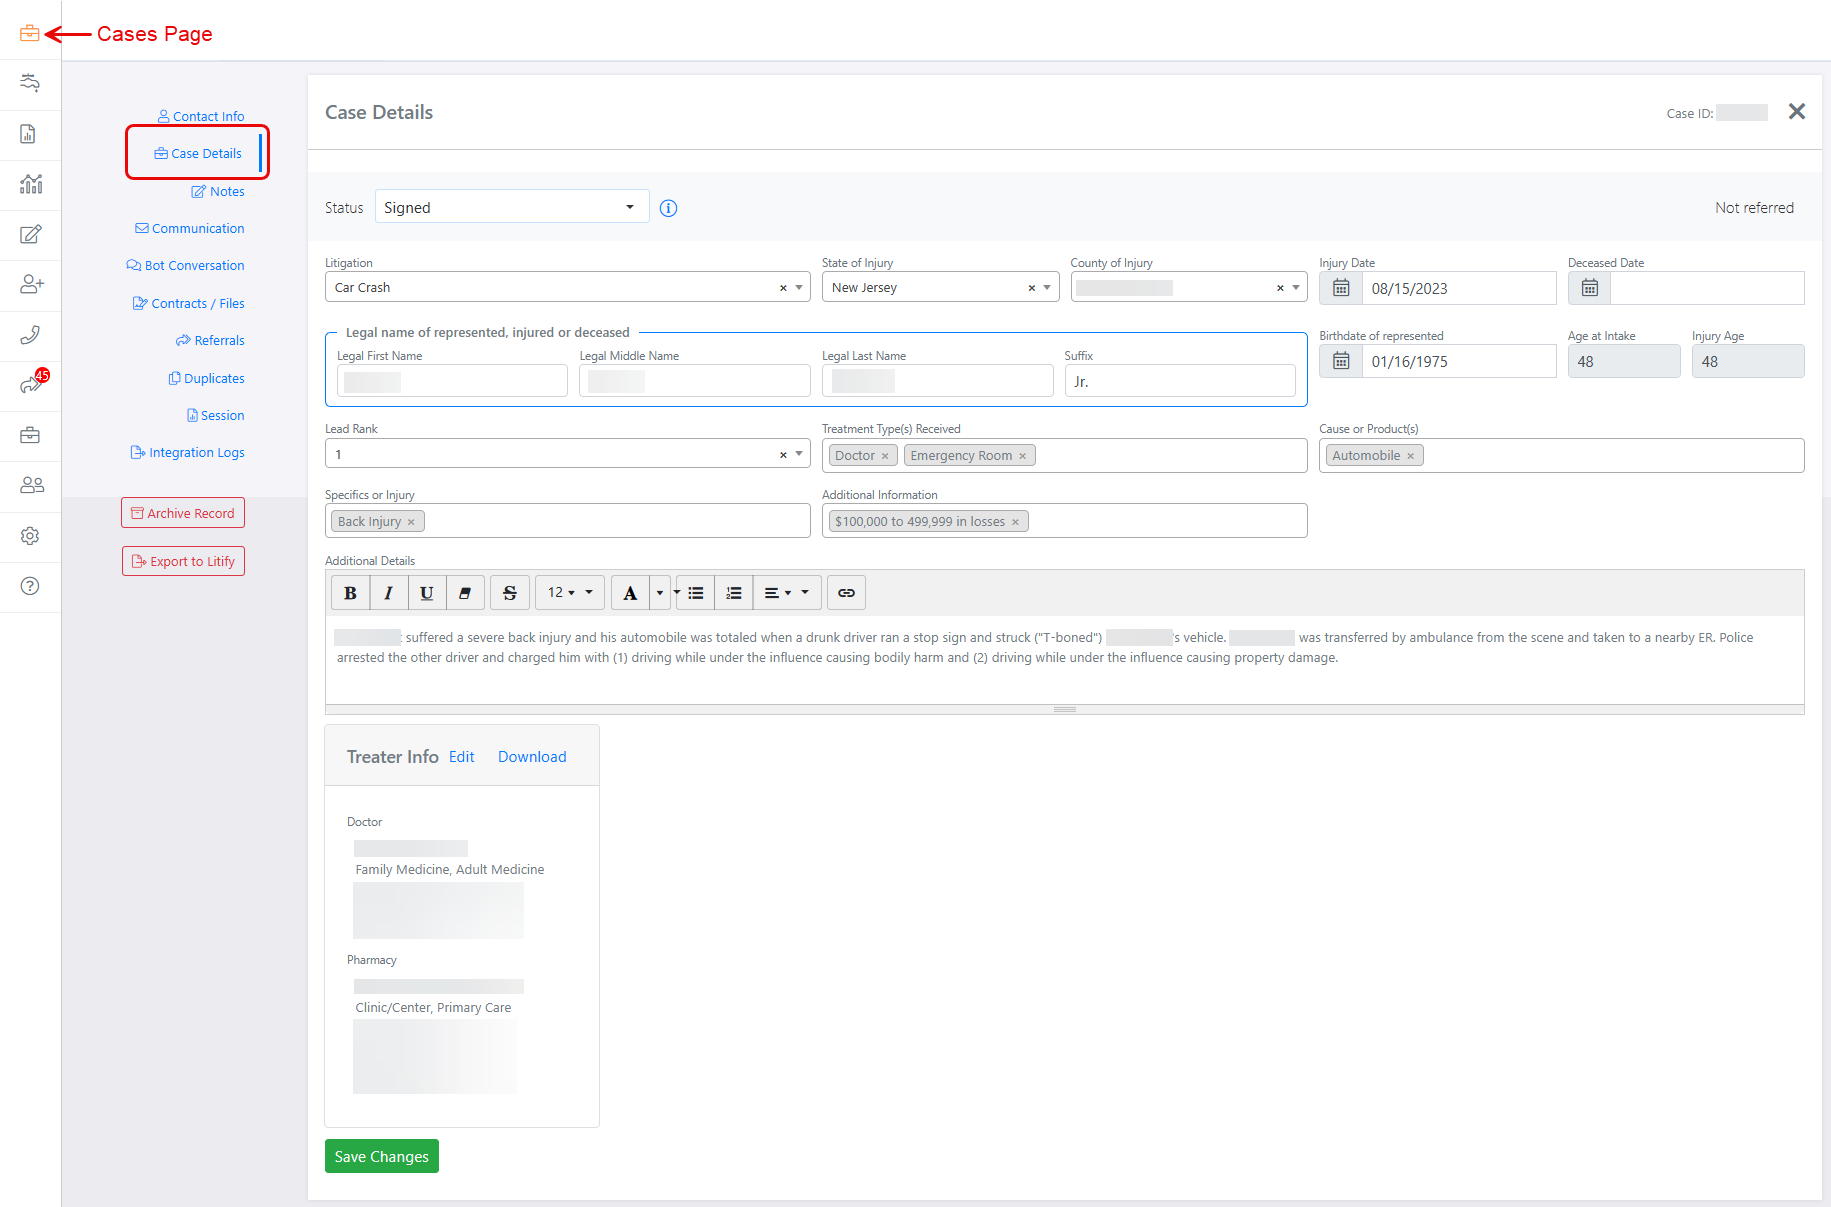
Figure 1. The Case Details tab, filled with information about a case. (Some data is blurred for privacy.)
REMINDER: Whenever you make a change on the Case Details tab, be sure to click the Save Changes button at the bottom of the tab. Otherwise, your changes will be lost when you close the tab or the case.
Specifying the Case’s Status
The Status field shows the case’s current acquisition status—that is, the state of the contract with the prospective client. To update the status, click the field’s drop-down arrow (Figure 2) and choose one of the following options:
- Closed. The case has been closed, either automatically or manually.
- Signed. The prospective client has signed a contract with your firm.
- Contract Pending – Auto. SimplyConvert automatically assigns this status when you send a contract to the prospective client through SimplyConvert and the client portal. (See Sharing Documents with a Client for more information.) At this stage, the contract is waiting for the prospective client’s signature. You cannot select this status manually.
- Contract Pending – Manual. This status indicates that a contract has been sent to the prospective client outside of SimplyConvert (e.g., via U.S. Mail, email, or some other method), but you are tracking the document’s mailing status in SimplyConvert, as described in Sharing Documents with a Client. At this stage, the contract is waiting for the prospective client’s signature.
- Pending Review. Your firm needs to review the case information before deciding to (a) send a contract to the prospective client or (b) close the lead.
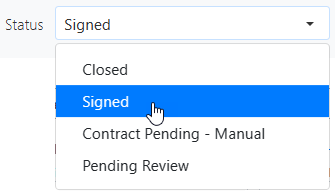
Figure 2. Selecting the case’s acquisition status.
NOTE: The Closed statuses have a variety of sub-statuses, as described in Using Filters to View Your Cases.
The Status field may update automatically when certain events occur. For example, if you sent a contract to the client via their SimplyConvert portal, the status changes to Signed when the client signs and submits the contract via the portal. You can still reset the Status field manually, if needed.
Adding Basic Injury Information
You can add basic information about the injured party and their injury—including the type of litigation stemming from the injury, and the location where the injury occurred—on the Case Details tab (Figure 3).

Figure 3. Adding information about the litigation and injury.
Take the following steps to add or update this information:
- Click the Litigation field’s drop-down arrow and select the type of litigation you plan to pursue based on the type of injury (Figure 4). The list contains all the litigation types in SimplyConvert’s database. You can select only one type of litigation per case, but you can select a different type whenever you need to.
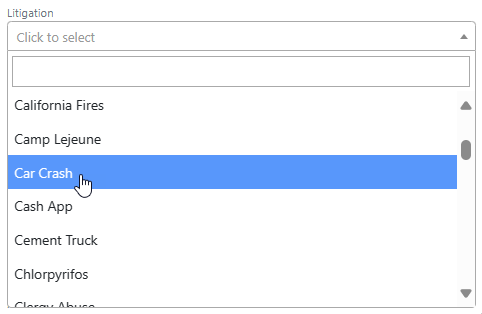
Figure 4. Selecting a litigation type.
NOTE: If you do not see the type of litigation you need in the Litigation field, you can submit a request to have it added. To do this, click Help > Contact Us at the bottom of the left-hand navigation pane. This applies to all fields featuring pre-populated drop-down lists.
- Click the State of Injury field’s drop-down arrow and select the state or American territory where the injury occurred (Figure 5).
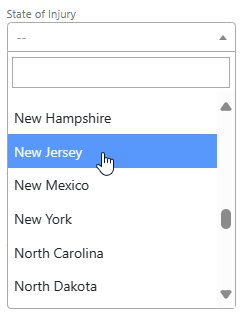
Figure 5. Specifying the state where the injury occurred.
- Click the County of Injury field’s drop-down arrow and select the county where the injury occurred (Figure 6). The list includes all the counties in the state you specified in Step 2, as well as the Puerto Rican municipalities.

Figure 6. Specifying the county where the injury occurred.
Specifying Key Dates
Certain dates are especially important in personal injury cases that may result in a settlement. You can set three key dates on the Case Details tab: the date of injury, the date of death if the injured party is deceased, and the injured party’s date of birth (Figure 7).
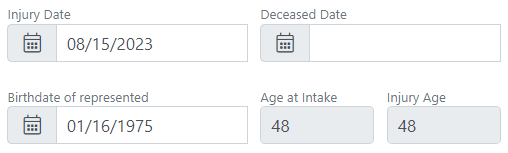
Figure 7. Date fields on the Case Details tab.
- To set any of these dates, click the desired date field to open the calendar tool (Figure 8).
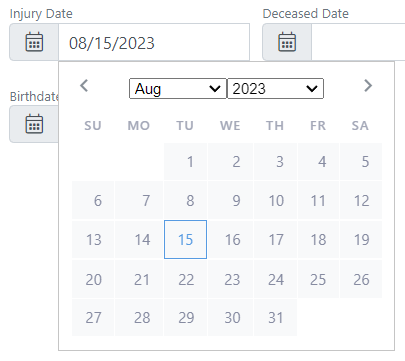
Figure 8. Using the calendar tool to specify an injury date.
- Click the Month and Year drop-down arrows to select a month and a year. Then click a date on the calendar for that month. The calendar tool closes when you click a date.
NOTE: When you set the injured party’s birthdate, their age is automatically calculated in the Age at Intake and Injury Age fields.
Updating the Injured Party’s Name
The Case Details tab includes fields for the injured party’s full legal name (Figure 9). If the injured party is the same person as the client, make sure that the name in these fields matches the name on the Contact Info tab (see Managing a Client’s Contact Information). Do not use nicknames or preferred names in these fields.
If the client is someone other than the injured party, such as a family member with power of attorney, enter that person’s name and contact information on the Contact Info tab.

Figure 9. These fields should display the client’s full legal name.
NOTE: If you update the client’s name on the Case Details tab, the change is not automatically picked up on the Contact Info tab, and vice versa. You need to manually update the name on both tabs.
Ranking the Lead
If your firm ranks incoming leads according to their likelihood of converting into successful cases, you can specify a rank. Here’s how:
- Click the Lead Rank field’s drop-down arrow and select a rank (Figure 10). The number 1 indicates the lead has the best chance of converting to a successful case; the number 3 indicates the lead has only a slim chance.
- You can change the ranking anytime by repeating Step 1.
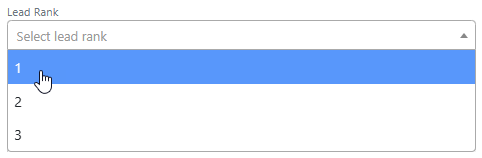
Figure 10. Specifying a rank for the lead.
Identifying the Injured Party’s Treatments
If the injured party has received one or more treatments for their injury, you can specify them all, like this:
- Click the Treatment Type(s) Received field’s drop-down arrow (Figure 11).
- Select a type of treatment the client has received to date.
- Repeat Steps 1 and 2 until all treatments have been selected. You can add treatments to and remove treatments from the list at any time.
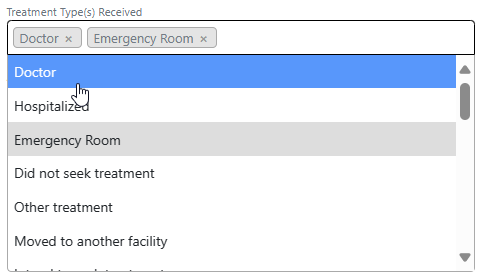
Figure 11. Specifying treatment types.
Identifying the Injury’s Cause
If either an event or a product potentially caused or contributed to the injury, you can specify it, as follows:
- Click the Cause or Product(s) field (Figure 12).
- Select a cause or a product. The cause can be generic (e.g., Work Related), or the name of a product, device, or action (e.g., Wegovy).
- Repeat Steps 1 and 2 until all causes or products are selected. You can update the list again anytime.

Figure 12. Specifying the cause of the injury.
Specifying the Injury
If you know the client’s exact injury or other specific information about the injury, you can specify them, as follows:
- Click the Specifics or Injury field (Figure 13).
- Select an injury or a specific detail about the injury. Many injury types are available, along with details about various injuries.
- Repeat Steps 1 and 2 until all injuries have been selected. You can update the field anytime.
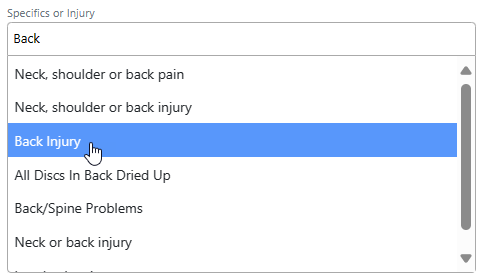
Figure 13. Specifying the client’s injury.
Adding More Data Points about a Case
By adding more specific data points about the case—such as the client’s estimated lost income or property damages, product usage or dosage information, or number of exposures or occurrences—you can help develop the case more fully. Here’s how to add more data points to a case:
- Click the Additional Information field (Figure 14).
- Select a data point that applies to the case.
- Repeat Steps 1 and 2 until all the desired data points have been selected. You can update the list anytime.
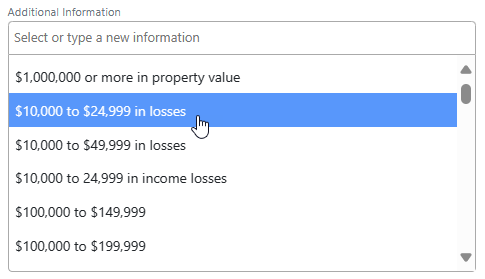
Figure 14. Adding specific data points to the case.
Adding More Descriptive Information about the Case
The Additional Details field lets you add free-form descriptive text about the case. To use the field, click in the large text box and start typing. The toolbar at the top of the field lets you format the text in many of the same ways as a word processor, add hyperlinks to documents or websites, and more. You can add as much text as you need, across as many sessions as needed.
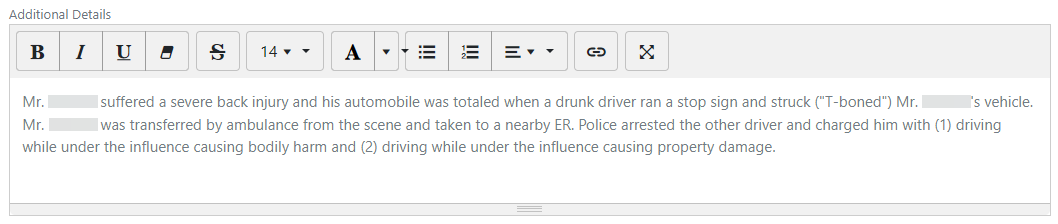
Figure 15. Adding more detailed information about the case.
Also, during intake, if the client provided a response when asked “Do you want to add any additional information,” the response appears in this field.