You can send key documents to a client by using the Files tab on the Cases page. When you share documents this way, they appear in PDF format on the client’s personal SimplyConvert portal, along with instructions for completing them, if necessary. Documents that require a signature or information from the client can be completed right on the portal. The system tracks the client’s progress on completing each document and displays the document’s status on the Files tab. The tab also lets you set up automatic follow-up reminders to the client, encouraging them to complete any outstanding documents.
NOTE: For more information about the SimplyConvert client portal, see Understanding the Client Portal.
If you need to mail a hard copy of a document to a client, you can use the Files tab to set and update the document’s mailing status.
Viewing Shared Documents
Take the following steps to open the Files tab:
- Open the Cases page.
- Filter the client list as needed, as described in Using Filters to View Your Cases.
- Find the case you’re looking for and click its row in the case list. The case opens and the case information tabs appear on the left.
- Click the Contracts/Files tab (Figure 1). Any documents that have been sent to the client are listed there.
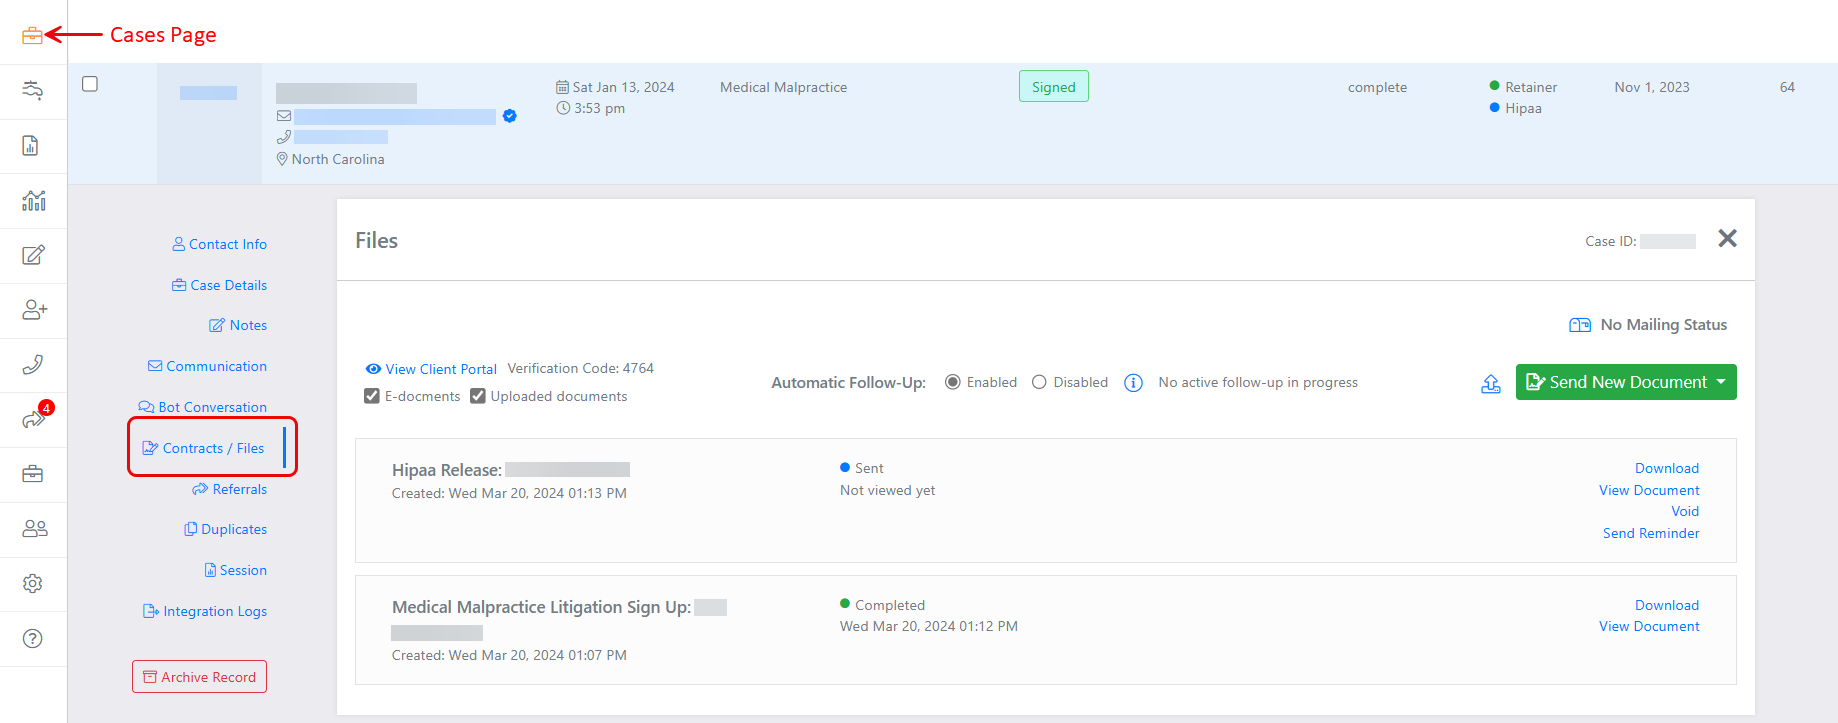
Figure 1. The Files tab shows information about documents that have been sent to the client. (Some data is blurred for privacy.)
The Files tab is divided into two sections:
- The top section (Figure 2) displays tools that let you perform a variety of tasks, such as viewing the client’s personal portal, enabling automatic reminders, and choosing a new document to send to the client. You can also set the status of a hard-copy document that has been sent to the client by mail.
- The bottom section (Figure 3) shows which documents have been sent to the client or uploaded to SimplyConvert as part of the case. Each document is represented by a card. If no documents have been shared yet, the message “No documents have been sent to this contact” appears on the tab.

Figure 2. Tools in the top section of the Files tab.
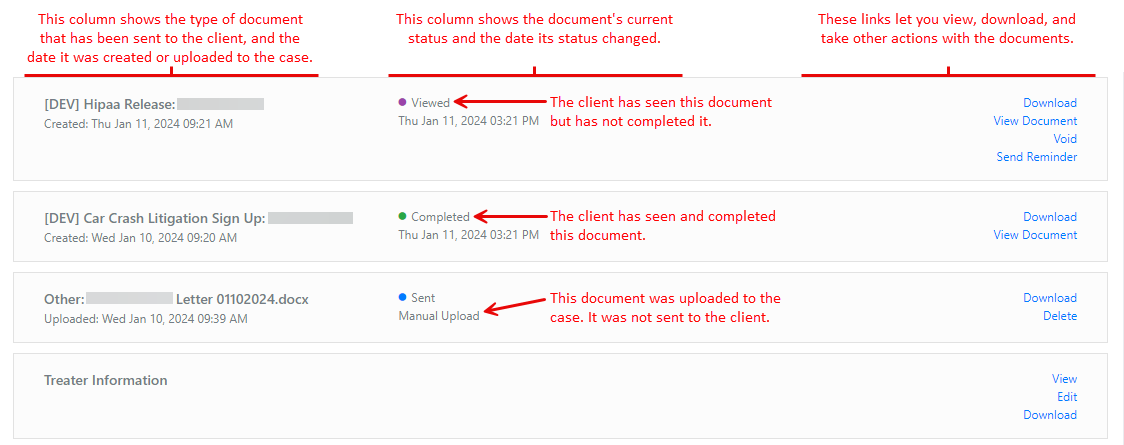
Figure 3. Information on the document cards.
NOTE: Some documents, such as retainers and HIPAA authorizations, appear on the Files tab as soon as they are placed on the client’s portal. Others, like Treater Information, do not appear on the tab until the client takes some kind of action on them.
Sending Documents to a Client’s Portal
At various points in a case’s life, the client needs to review or sign certain types of documents. SimplyConvert provides a set of key case documents, based on templates customized for your firm, which you can send to the client with a few clicks of the mouse. When you send the document, the system adds it to the client’s portal and notifies the client via email and/or a text message.
Sending a Contract to the Client
A contract is usually the first document sent to a prospective client. Take the following steps to send a contract for a client’s signature:
- On the Files tab for the case, check the cards (if any) to make sure that a contract has not already been sent to the client. If not, continue with Step 2.
- Click the Send New Document button. A list of available documents drops down (Figure 4).
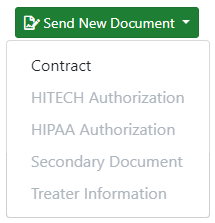
Figure 4. Selecting a contract to share with a client.
NOTE: In Figure 4, “Contract” is the only available option because a contract has not been sent yet. Typically, no other documents are sent until the client signs the firm’s contract.
- Click Contract. The Send New Contract dialog box opens (Figure 5).
Review the fields in the dialog box. If this is the first time a contract is being sent, you should not need to edit the fields as they display information provided by your administrator during SimplyConvert’s configuration. If the client has previously received a contract, SimplyConvert fills the fields with the same information that went out with the first contract; ask your system administrator if the information is still correct or if it needs to be updated.
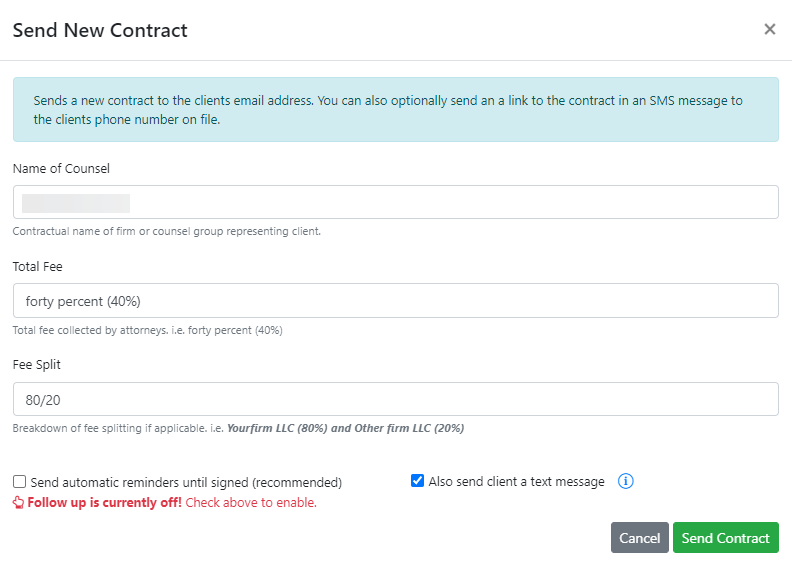
Figure 5. Checking the fields in the Send New Contract dialog box.
- If you want SimplyConvert to automatically follow up with the client and remind them to sign the contract, select the Send automatic reminders until signed checkbox. By default, SimplyConvert sends follow-up reminders to the client once a day for the first week, then once every other day for the next three weeks.
- By default, the Also send client a text message checkbox is selected, triggering an automated text message to the client stating that the contract has been shared to their client portal and awaits signature. The message includes a link that opens the portal. If you do not want to send the text message, deselect this checkbox.
- Click Send Contract. The dialog box closes and the system posts the contract to the client’s portal. The Files tab now displays a card showing the contract’s status (Figure 6).
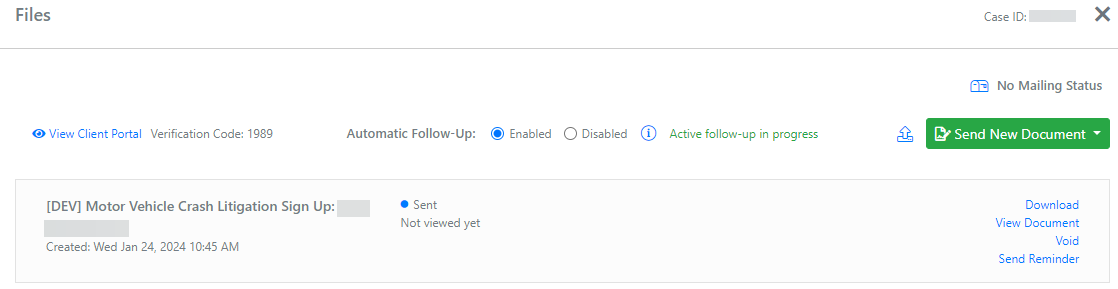
Figure 6. The Files tab, after the contract has been shared with the client.
NOTE: When the client views the contract on the portal, its status on the File tab changes to “Viewed.” When the client signs the contract, the status changes to “Completed.”
- To make sure the document is on the client’s portal, click View Client Portal, near the top of the Files tab. The portal opens on a new tab in your browser. When a document requires the client’s attention, an instruction always appears on the portal, as shown in Figure 7.

Figure 7. A client’s portal after a contract has been sent. Here, the contract is waiting to be completed.
When the client clicks the Get Started button, the contract becomes visible so they can sign it. Flags indicate where initials and a signature should go (Figure 8). When the client finishes signing, the contract’s card is updated on the Files tab (Figure 9). You also receive an email notification that the contract has been signed.
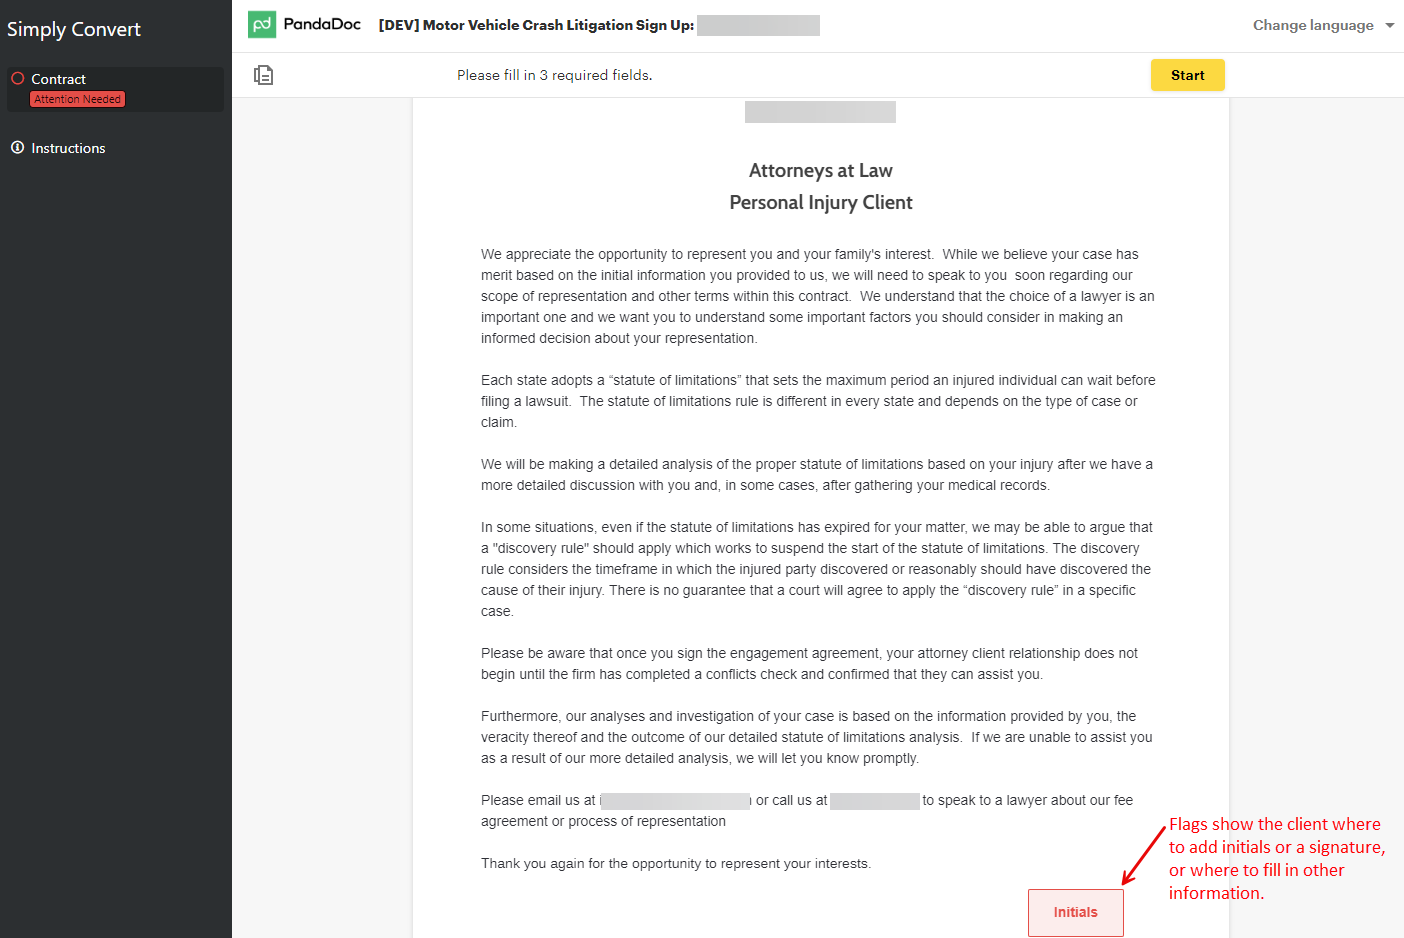
Figure 8. The contract, ready to be signed.

Figure 9. Once signed, the contract’s status updates to “Completed” on the card.
- To download a copy of the signed contract to your computer, click the Download link at the right end of the card.
- To view the signed contract without downloading it, click the View Document The contract opens in your PDF viewer.
Sending Other Documents after the Contract
Depending on the document settings associated with the litigation or campaign, SimplyConvert may automatically send other standard case documents to the client portal after the contract is signed. Some of the documents may also appear as cards on Files tab on the Cases page. Otherwise, you need to send the documents manually, as described in the following sections.
Sending a HITECH Authorization
A Health Information Technology for Economic and Clinical Health (HITECH) Authorization asks the client’s healthcare provider to deliver a complete copy of the client’s medical and billing records in electronic format, such as PDF. Note that this authorization may not be required for every case.
To send a HITECH authorization to the client portal:
- On the Files tab, click the Send New Document button. The list of available documents opens (Figure 10).
- Click Hitech Authorization. The Send Hitech Authorization dialog box opens (Figure 11).

Figure 10. Selecting the HITECH Authorization.

Figure 11. Selecting options before sending a HITECH Authorization.
- By default, the Send client an email checkbox is selected. This triggers SimplyConvert to send an email to the client, stating that the authorization has been shared to their portal and awaits signature. The message includes a link to the portal. If you do not want to send the email, clear this checkbox.
- If you want SimplyConvert to send the client a text message about the authorization (also with a link to the portal), select the Send client a text message checkbox. By default, this checkbox is clear.
- Click Send Hitech Authorization. A card appears on the Files tab (Figure 12), displaying actions you can take with the document:
- Download. This option downloads the authorization to your computer.
- View Document. This option opens the authorization in your PDF viewer.

Figure 12. The card for a HITECH Authorization, with action options on the right.
-
- Void. This option opens the Void HITECH dialog box, which lets you cancel the document, so the client no longer needs to complete it (Figure 13).
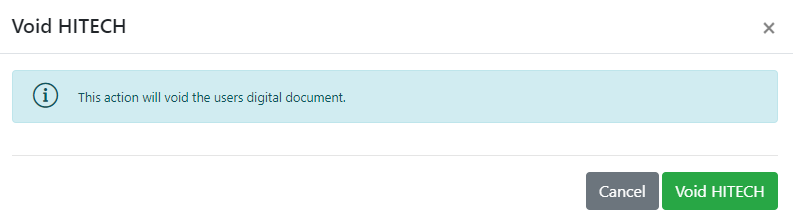
Figure 13. Voiding a HITECH Authorization after sending it to the client portal.
-
- Send Reminder. This option opens the Send Reminder dialog box (Figure 14), so you can manually create an email reminder for the client, stating that the authorization still needs to be completed. This is helpful when automatic reminders are disabled for the case or when they have expired. Click the composition window and edit the default text to customize the message. You can use the toolbar to format the text. If you want to send the message via text as well as email, select the Also send client a text message checkbox. When you’re finished, click Send Reminder.

Figure 14. Creating a reminder message for the client.
Sending a HIPAA Authorization
A Health Insurance Portability and Accountability Act (HIPAA) Authorization is a form the client usually must sign, granting permission to covered entities to release his or her protected health information to your firm or another party that the client designates.
To send a HIPAA Authorization to the client portal:
- On the Files tab, click the Send New Document button. The list of available documents opens (Figure 15).
- Click HIPAA Authorization. The Send Hipaa Authorization dialog box opens (Figure 16).

Figure 15. Selecting the HIPAA Authorization.
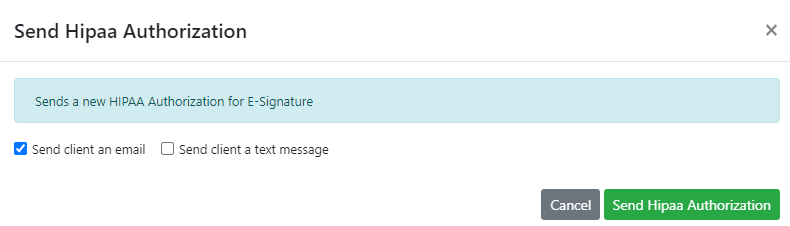
Figure 16. Selecting options before sending the authorization.
- By default, the Send client an email checkbox is selected. This triggers SimplyConvert to send an email to the client, stating that the authorization has been shared to their portal and awaits signature. The message includes a link to the portal. If you do not want to send the email, clear this checkbox.
- If you want SimplyConvert to send the client a text message about the authorization (also with a link to the portal), select the Send client a text message By default, this checkbox is clear.
- Click Send Hipaa Authorization. A card appears on the Files tab (Figure 17), displaying actions you can take with the document:
-
- Download. This option downloads the authorization to your computer.
- View Document. This option opens the authorization in your PDF viewer.

Figure 17. The card for a HIPAA Authorization, with action options on the right.
-
- Void. This option opens the Void HIPAA dialog box, which lets you cancel the document, so the client no longer needs to complete it (Figure 18).
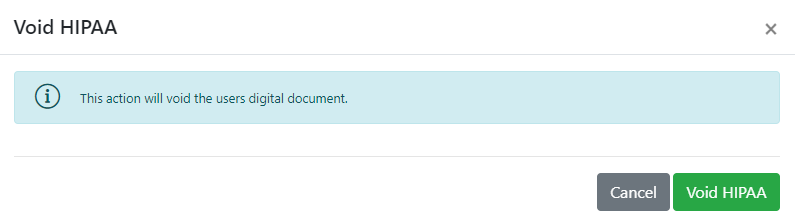
Figure 18. Voiding a HIPAA Authorization after sending it to the client portal.
-
- Send Reminder. This option opens the Send Reminder dialog box (Figure 19), so you can manually create an email reminder for the client, stating that the authorization still needs to be completed. This is helpful when automatic reminders are disabled for the case or have expired. Click the composition window and edit the default text to customize the message. You can use the toolbar to format the text. If you want to send the message via text as well as email, select the Also send client a text message When you’re finished, click Send Reminder.
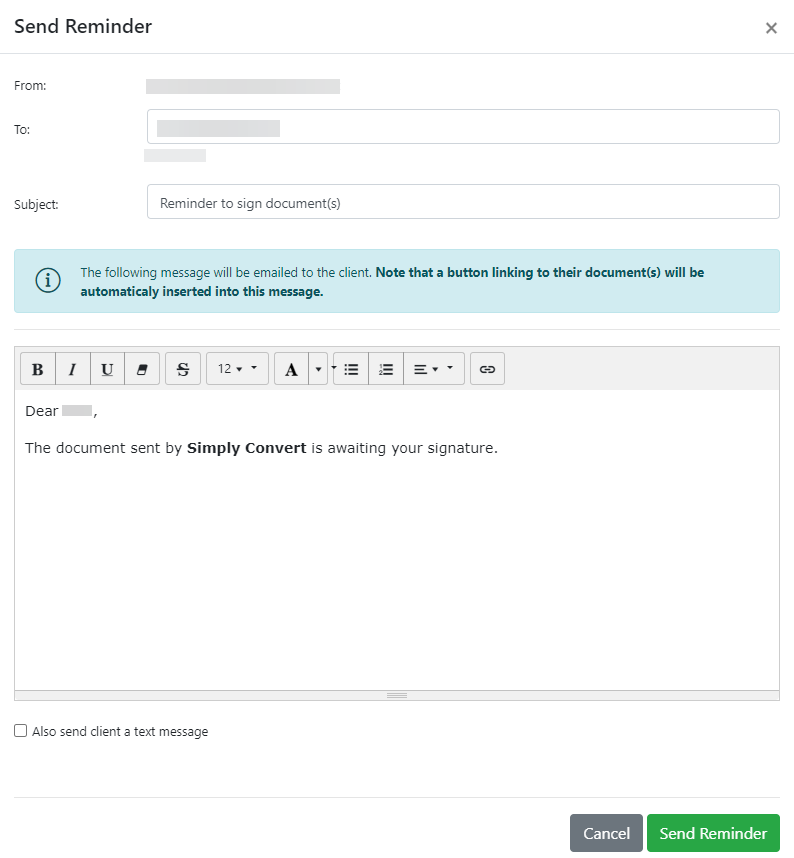
Figure 19. Creating a reminder message for the client.
Sending a Secondary Document
A secondary document can be any of several document types, such as a disclosure or questionnaire. The type and number of secondary documents are determined by (a) your firm’s requirements for the kinds of information to be gathered, and (b) the client’s case type (e.g., car crash, device injury, etc.).
To send a secondary document to the client portal:
- On the Files tab, click the Send New Document button. The list of available documents opens (Figure 20).
- Click Secondary Document. The Send Secondary Document dialog box opens (Figures 21 and 22).
- Click the Select Document to Send drop-down arrow, then choose the type of document you want to send to the client.

Figure 20. Selecting Secondary Document.
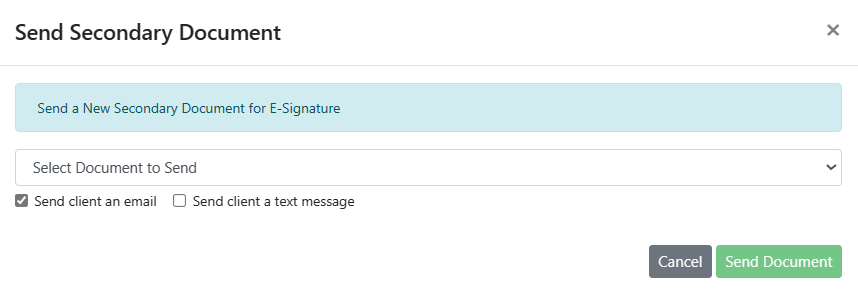
Figure 21. The Send Secondary Document dialog box.

Figure 22. Selecting a document type in the Send Secondary Document dialog box.
- After selecting the document, you can select whether to notify the client by email, text, or both:
-
- To notify the client by email, leave the Send client an email checkbox selected (this is the default). SimplyConvert sends an email that lists the type of document and provides a link to the client portal.
- To notify the client by text, select the Send client a text message checkbox (it is clear by default). SimplyConvert sends a text message that lists the type of document and provides a link to the client portal.
- To send both email and text messages, select both checkboxes.
- Click Send Document.
Requesting Treater Information
Treater Information is not actually a document; rather, it is a fillable form that appears on the portal so the client can identify the doctors or facilities that provided treatment for the injury, and pharmacies that filled any related prescriptions.
Here’s how to request treater information from a client:
- On the Files tab, click the Send New Document button. The list of available documents opens (Figure 23).
- Click Treater Information. The Send Treater Information dialog box opens (Figure 24).
- In the dialog box, you can select whether to notify the client by email, text, or both:
-
- To notify the client by email, leave the Send client an email checkbox selected (this is the default). SimplyConvert sends an email that requests treater information and provides a link to the client portal.
- To notify the client by text, select the Send client a text message checkbox (it is clear by default). SimplyConvert sends a text message that requests treater information and provides a link to the client portal.
- To send both email and text messages, select both checkboxes.
- Click Send Treater Information Form. SimplyConvert sends the form to the client’s portal.

Figure 23. Selecting Treater Information.
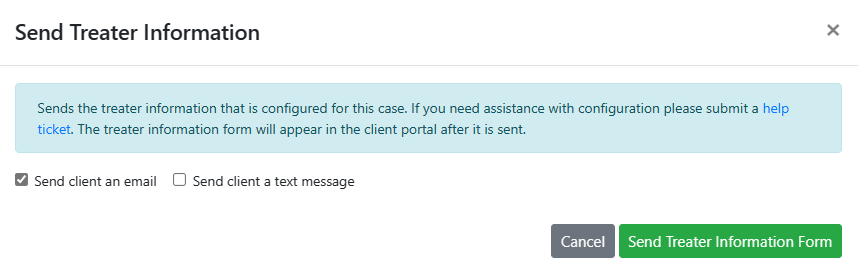
Figure 24. Sending a request for treater information to the client portal.
- The client adds the required information to the form, which lets the client search for doctors and pharmacists (Figure 25).
When the client provides this information, a new card is added to the Files tab, where you can view, edit, or download the information (Figure 26). The information is also added to the Case Details tab, where you can edit or download it (Figure 27).
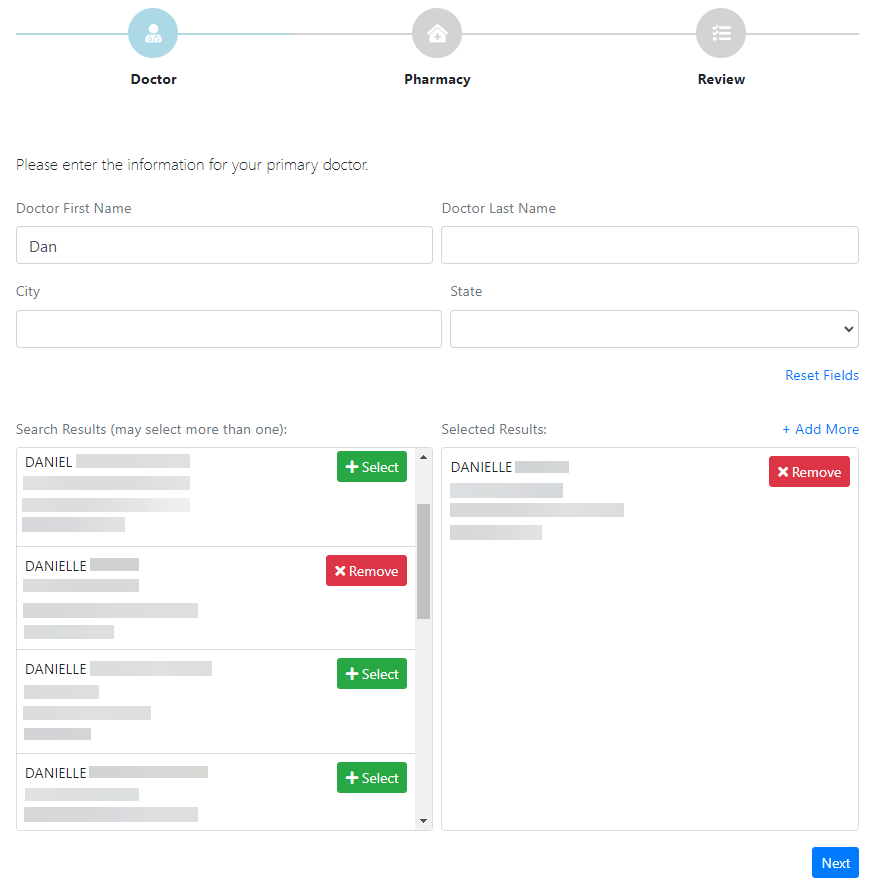
Figure 25. The client adds treater information by completing this form.

Figure 26. The treater information is represented by a card on the Files tab.
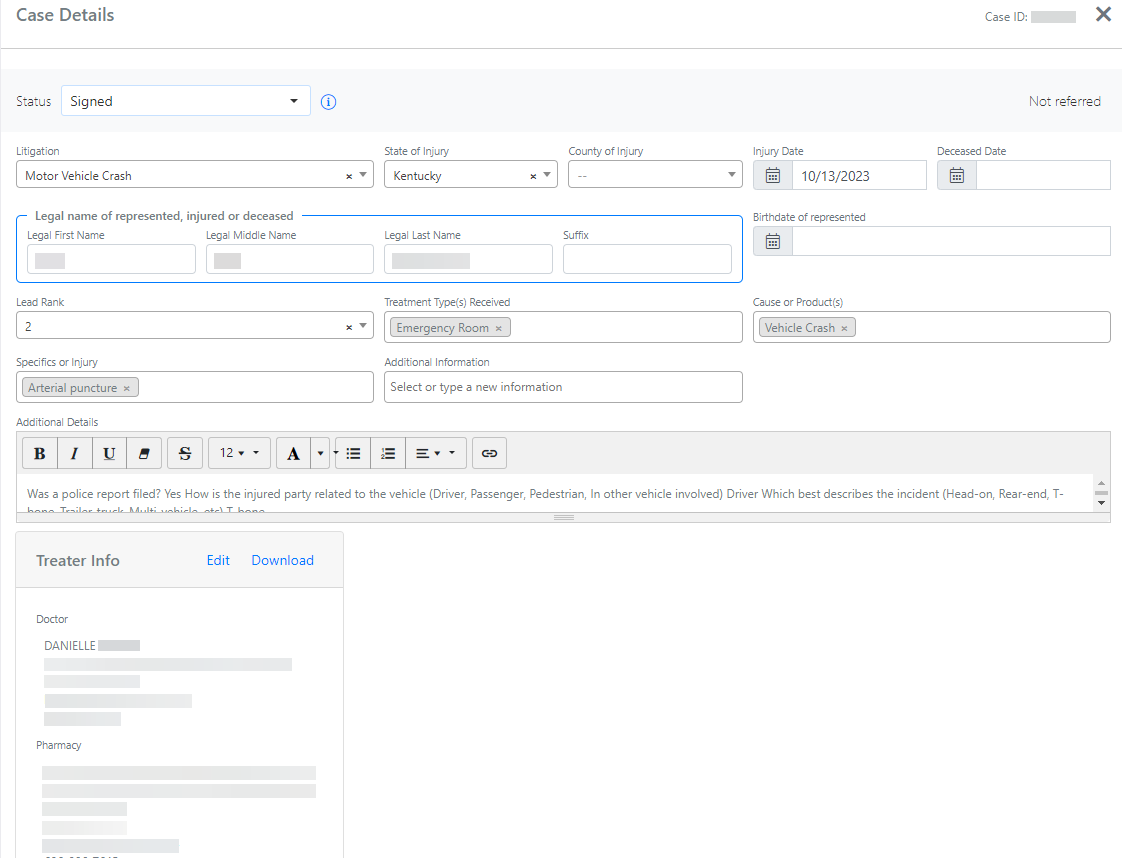
Figure 27. Treater information on the Case Details tab. (Some data has been blurred for privacy.)
Setting Automatic Follow-Ups for Case Documents
When you start sending case documents to a client, you can set SimplyConvert to send automatic reminders to encourage the client to review and complete the documents. Reminders are sent in the manner and on the schedule configured in your SimplyConvert installation. The reminders stay active for one month for contracts, and for three months for all other documents. Reminder messages stop when the client has nothing more to complete. Even after SimplyConvert stops sending automatic reminders, leaving reminders active allows the case to be added to an automatic follow-up campaign.
Here’s how to set automatic reminders:
- On the upper section of the Files tab, find the Automatic Follow-Up option buttons (Figure 28). Reminders are disabled by default.
- To enable reminders, click the Enabled option button. SimplyConvert starts sending reminders to the client whenever you share a new document to the client portal.
- To disable reminders at any time, return to the Files tab and click Disabled. Reminders will stop going out immediately.

Figure 28. The option buttons for enabling and disabling automatic reminders.
NOTE: If you have questions about reminders, contact your system administrator or reach out to SimplyConvert Support at support@simplyconvert.com.
Uploading a Document to a Case
You can upload all kinds of documents to a case in SimplyConvert, ensuring they are secure and always associated with the case and client. These documents can include proof of insurance, estate documents, letters of representation, etc. You have the option of sending such documents to the client; if not, they are simply stored with other case documents in SimplyConvert.
Take the following steps to upload a document to a case:
- On the upper section of the Files tab for a case, click the File Upload icon (Figure 29). Windows’ Open dialog box opens (Figure 30).

Figure 29. The File Upload icon.
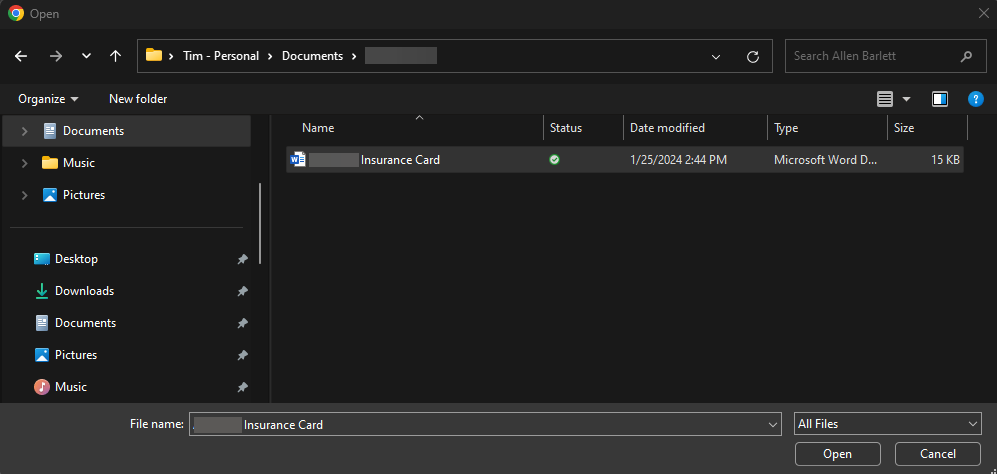
Figure 30. Selecting a file to upload to a case.
- Navigate to the document you want, select it, and click Open. The Upload Document dialog box opens (Figure 31).
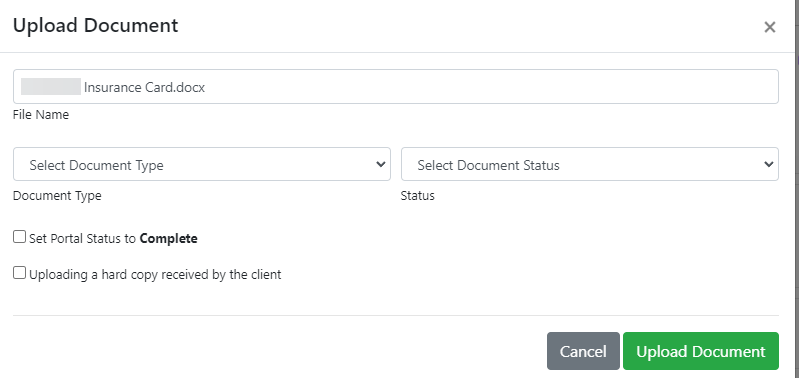
Figure 31. Selecting options before uploading a document.
- The file’s name appears in the File Name field. You can edit the field to save the file with a different name.
- Click the Document Type drop-down arrow and select the document type that best describes the file you are uploading. In many cases, Other is the most appropriate choice.
- Click the Status field and select the document’s status, as follows:
-
- If you plan to send it to the client portal (as described in Sending a Secondary Document, above), select Sent to Client.
- If the document is already complete and does not need to be sent to the client (for example, if the client sent you the document), select Signed/Completed.
- If the document requires review by someone in your firm, select Review.
- If you are sending the document to the portal but the client does not need to act on it, select the Set Portal Status to Complete checkbox.
- If you received the document from the client and do not need to share it to the portal, select the Uploading a hard copy received by the client checkbox.
- Click Upload Document. A card for the document is added to the Files tab (Figure 32). At the right end of the card, you have an option to download a copy of the document to your computer, and to delete the document from the case.

Figure 32. The card for a newly uploaded document.
Setting the Mailing Status for a Mailed Document
If a client requests a hard copy of a document that you would normally share via the client portal, you can log the document’s mailing status on the Files tab (Figure 33). You can use this status for documents sent by U.S. Mail or by whatever courier service your firm uses.

Figure 33. Viewing a document’s mailing status.
Here’s how to set the mailing status of a hard-copy document:
- Click the Mailing Status (mailbox) icon near the top of the Files tab. The Mailing Status dialog box opens (Figure 34).

Figure 34. The Mailing Status dialog box.
- Click the Mailing Status drop-down arrow and select one of the following statuses:
-
- Client requests hard copy. You received the client’s request for a hard copy of the document, which you will send by mail, but the document has not been sent yet.
- Hard copy sent. You have placed the document in outgoing mail. When you select this status, click the Mailing Date field, and select the date you mailed the document.
- Client received hard copy. You have confirmed that the client has received the document.
- Hard copy returned. If the client needed to complete and/or sign the document, this status indicates they have done so, and the document has been returned to the firm.
- Click Save. The status (and mailing date, if set or changed) is updated on the Files tab.