Complete, accurate contact information is essential to the successful handling of any case, especially when the client’s information must be shared with another firm or an agency (such as Medicare or Medicaid) at any point in the process. On the Cases page, the Contact Info tab lets you manage and update this information.
TIP: Whenever possible, verify the client’s contact information, particularly in personal injury cases. People suffering an injury may be in pain or under emotional strain. Such clients sometimes provide incorrect or incomplete information, such as basic contact information, date of injury, insurance information, or Social Security Number.
Take the following steps to open the Contact Info tab and edit its information:
- Open the Cases page.
- Filter the client list as needed, as described in Using Filters to View Your Cases.
- Find the case you’re looking for and click its row in the case list. The case opens and the case information tabs appear.
- Click the Contact Info tab (Figure 1). Initially, the tab contains only the information that the client provided during case intake—for example, when answering questions for the SimplyConvert chatbot. You can add or edit information directly in any of the fields.
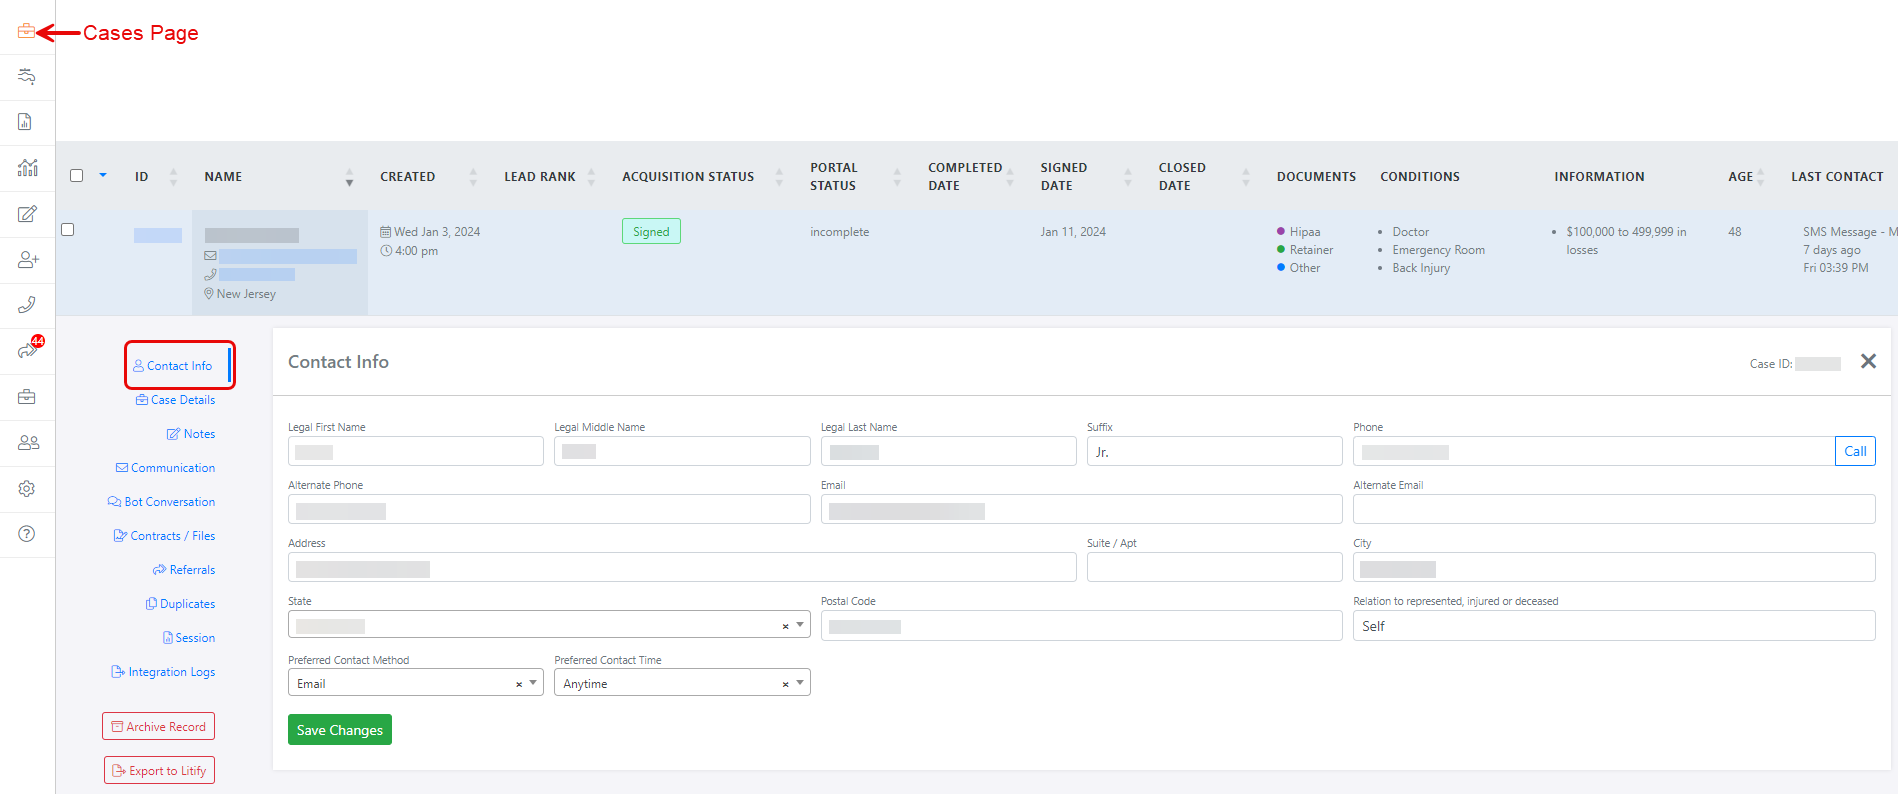
Figure 1. The Contact info tab for a client. (Some data is blurred for privacy.)
REMINDER: Whenever you make a change on the Contact Info tab, be sure to click the Save Changes button at the bottom of the tab. Otherwise, your changes will be lost when you close the tab or the case.
- In the Name fields, check the client’s name for accuracy and completeness (Figure 2). The fields should show the client’s full legal name, including middle name and any suffix the client may use (Sr., Jr., III, etc.). The name should match the name on the client’s driver’s license or passport. Never use nicknames or preferred names in these fields.

Figure 2. The Name fields should show the client’s full legal name.
- The Phone field should display the client’s primary phone number (Figure 3). If the client can be reached at a second number, enter it in the Alternate Phone field. You can enter a number in any standard format (such as 5551112222, 555-111-2222, or (555) 111-2222). SimplyConvert automatically determines if the phone number is a cell phone number. If so, the program uses the number to send text messages to the client. Otherwise, the number is assumed to be a land line

Figure 3. The Phone field should contain the client’s primary telephone number.
NOTE: If your computer is configured to make outgoing telephone calls (using an application such as Zoom, Teams, or Skype, among others), you can click the Call button to call the client’s phone number. For more information about contacting clients, see Communicating with Clients through SimplyConvert.
- The Email field displays the client’s primary email address (Figure 4). This is the address that SimplyConvert uses by default when sending email messages to the client. If the client has a second email address, enter it in the Alternate Email field.

Figure 4. The Email Fields.
- The Address section of the tab includes several fields, which should show the client’s complete, permanent postal mailing address (Figure 5). The State field is a drop-down menu that lists all 50 states, the District of Columbia, and several U.S. territories. The other fields are free-form text fields.

Figure 5. The Address Fields.
- The Relation field should show how the client is related to the party your firm is representing (Figure 6). Typically, the client is the person being represented (Self) but may be a personal representative such as a spouse, parent, or someone else with power of attorney.

Figure 6. The Relation field.
- The Preferred Contact Method field lets you specify the best way to contact the client (Figure 7). This should be the method the client prefers; the options are Email, Mail, Phone, and Text. The Preferred Contact Time field lets you specify the best time of day to contact the client; the options are Morning, Afternoon, Evening, and Anytime.

Figure 7. The Preferred Contact fields.