Filters give you a way to view only the cases you want to see in the case list while hiding all other cases. Filters let you set criteria, then SimplyConvert displays only those cases that match those criteria (unless you choose a filtering option that tells it to display something else). For example, you can use the Litigation filter to view only cases associated with a specific litigation. By using multiple filters, you can get more precise results and see only a limited number of cases.
Filtering Basics
By default, SimplyConvert shows a single row of filters at the top of the Cases page (Figure 1). To view the full set of filters (Figure 2), click the More Filters button. To collapse the Filters Panel to its default view, click Less Filters.
![]()
Figure 1. The default view of filters on the Cases page. The More Filters button is circled.
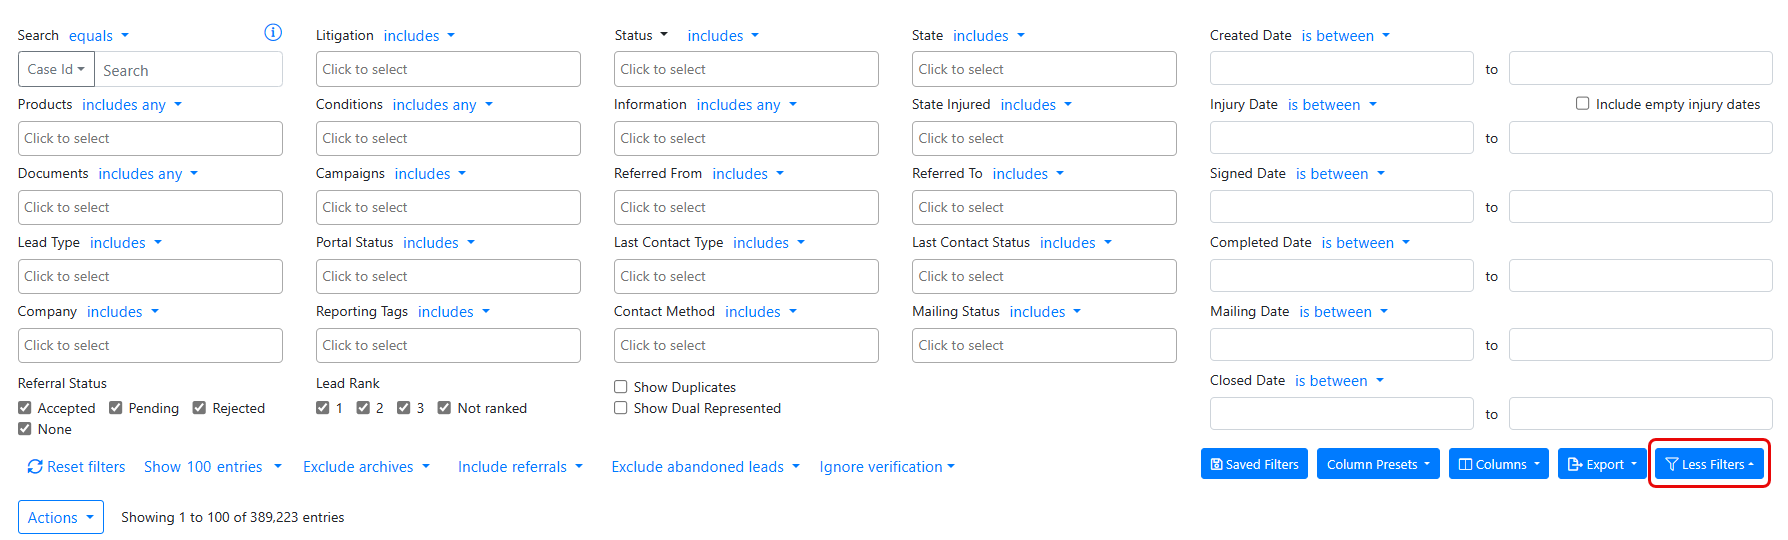
Figure 2. The full set of filters. The Less Filters button is circled.
NOTE: When you are done viewing a filtered set of cases, click Reset filters in the lower-left corner of the panel to clear all the filters you have set. All cases come back into view on the Cases page.
You can use one filter or multiple filters in any combination you like, and many filters let you select multiple criteria (such as the Product or Litigation filters, among others). After selecting a criterion, just click a blank area of the field to re-open its drop-down list to select another one. If you pick a criterion by mistake or change your mind about one you selected, you can remove it from the filter by clicking the X next to its name.
Filtering Options
As shown in Figure 2 (above), most of the filters have a blue drop-down arrow next to their name. You can click the arrow to open a list of options that work with the filter; many of these options are explained in this article. By default, the most commonly used option is automatically selected, and its name appears after the blue drop-down arrow.
Some of the filters (such as Status and Litigation) have two filtering options:
- Includes. Select this option to include only cases that match the criteria you selected for the filter. For example, if you select Asbestos as the litigation and choose the Includes filter, SimplyConvert displays only Asbestos cases.
- Excludes. Select this option to exclude cases that match your selected criteria, and show cases matching the filter’s other criteria. For example, if you select Asbestos as the litigation and choose the Excludes filter, SimplyConvert hides all the Asbestos cases and displays cases from all other litigations.
Some of the filters (such as Products) have four filtering options:
- Includes any. Select this option to include any cases that have at least one of the filtering criteria you choose in that field. For example, if you choose Asbestos and Talcum Powder in the Products field, the Includes any option will filter the case list to show cases that include either one of those two products.
- Includes all. Select this option to include any cases that have all the filtering criteria you choose in that field. For example, if you choose Asbestos and Talcum Powder in the Products field, the Includes all option will filter the case list to show cases that include both of those products.
- Excludes any. Select this option to exclude any cases that have all the filtering criteria you choose in that field. For example, if you choose Asbestos and Talcum Powder in the Products field, the Excludes any option will filter the case list to show cases that do not include those two products.
- Excludes all. Select this option to exclude any cases that have at least one of the filtering criteria you choose in that field. For example, if you choose Asbestos and Talcum Powder in the Product field, the Excludes all option will filter the case list to show cases that do not have either one of those two products.
Some filters have their own unique set of filtering options. Those are explained below, in the discussions of those filters.
Understanding the Filters
The following sections provide brief descriptions of every filter in the Filters Panel.
Search
You can use the Search field to find one or more cases that match one of four criteria. To start, click the drop-down arrow to the left of the field (Figure 3).
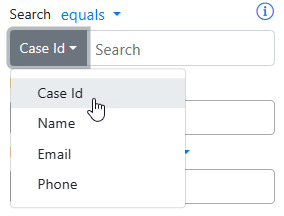
Figure 3. Selecting a criterion from the Search field.
Next, select one of the criteria:
- Case ID. To search for one case, select Case ID (if necessary), click in the Search field, enter the Case ID, and press Enter. To search for multiple cases, enter Case IDs separated by commas (e.g., 87654, 86421). When searching for cases by Case ID, you can click the blue drop-down arrow and click equals to show only the cases that match the IDs or click not equals to show every case except for those that match the IDs.
- Name. You can search for one or more cases based on the names of clients and injured individuals. A name can be a last name, a first name, or a combination of both. To search for a particular case, select Name, click in the Search field, enter the first or last name (or both separated by a comma), and press Enter. To search for multiple names, separate the names with a semi-colon instead of a comma (e.g., lname1, fname1; lname2, fname2; lname3).
- Email. To search for one case, select Email, click in the Search field, enter the email address, and press Enter. To search for multiple cases, enter the addresses separated by commas (e.g., address@email.com, address@mail.com), then press Enter.
- Phone. To search for one case, select Phone, click in the Search field, enter the phone number, and press Enter. You can enter phone numbers in any traditional format, such as 1234567890, 123-465-8970, or (123) 456-7890. To search for multiple cases, enter the numbers separated by commas (e.g., 123-456-7890, 654-321-0987), then press Enter.
You can use any of the following search options when searching for names, email addresses, and phone numbers. You can view the options by clicking the drop-down arrow above the Search field (Figure 4).
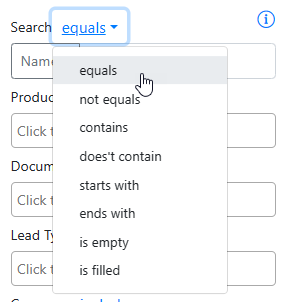
Figure 4. Search options for the Search filter.
The options include:
-
- Equals. The name, email address, or phone number must exactly match what you you enter in the Search field.
- Not equals. The name, email address, or phone number must not match what you enter in the Search field.
- Contains. The name, email address, or phone number must contain the text you enter in the Search field. The text may be only part of a name, email address, or phone number.
- Doesn’t contain. The name, email address, or phone number must not contain the text you enter in the Search field.
- Starts with. The name, email address, or phone number must begin with the text you enter in the Search field. The text may be the first few characters of a name, email address, or phone number. For example, if you enter “Smi” the results might be names like Smith, Smithers, Smithfield, etc.
- Ends with. The name, email address, or phone number must end with the text you enter in the Search field. The text may be the last few characters of the name, email address, or phone number For example, if you enter “son“ the result might be names like Edson, Thompson, Henderson, etc.
- Is empty. If you choose this option, the Search field automatically populates with the text “IS EMPTY.” The search results include cases where all name, email address, or phone number fields are blank.
- Is filled. If you choose this option, the Search field automatically populates with the text “IS FILLED.” The results will show cases where at least one name, email address, or phone number field contains text.
Litigation
The Litigation filter includes all the litigations available in SimplyConvert. This means the list may include litigations for which your firm has no cases. New litigations are added periodically, and the list automatically updates to include them.
To view cases related to a specific litigation, click the Litigation field and select a litigation from the list (Figure 5). The list closes after you select a litigation; just click the field again to re-open the list and select one or more additional litigations.
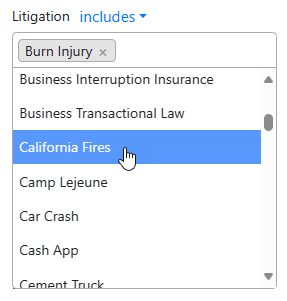
Figure 5. Selecting litigations.
After selecting a litigation, you can optionally click the blue drop-down arrow and click includes to show only cases in the selected litigation or click excludes to show cases in any other litigation.
Status
To view cases with a given acquisition status (that is, the state of contracting with the client), click the Status field and select one or more of the following options:
- Closed. Displays inactive cases that have been closed, either automatically or manually.
- Contract Pending. Displays cases for which a contract has been sent and is awaiting the client’s signature.
- Contract Expired. Displays cases where the contract was not signed within 30 days and was automatically voided.
- Contract Voided. Displays cases where the contract was manually voided at the request of an attorney or the client.
- Pending Review. Displays cases that are awaiting manual review of case details before a decision can be made on sending a contract or closing.
- Message. Displays cases where the client has sent a message/note that needs review.
- Signed. Displays cases where the client has signed their retainer.
- Other. Displays cases with an acquisition status of “Other.”
After selecting a status, you can optionally click the blue drop-down arrow and click includes to show only cases with the selected status or click excludes to show cases with any other status.
You can also filter cases by their sub-status if they have one. To select a sub-status, click the black drop-down arrow next to the Status field’s name, then click Sub-Status (Figure 6). Click the field to open a list of sub-statuses.

Figure 6. Filtering cases by sub-status.
State
To filter for cases by the client’s state of residence, click the State field and select one or more states (Figure 7). The filter includes all 50 states, the District of Columbia, American Samoa, and Puerto Rico. Optionally, click the blue drop-down arrow and click includes to show only cases in the selected state, or click excludes to show cases that are in any other state.
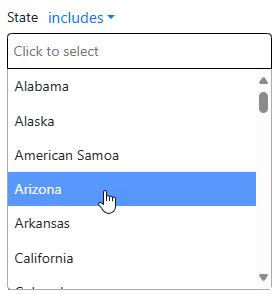
Figure 7. Filtering cases by the client’s state of residence.
Created Date
To view cases according to the date they were added to SimplyConvert, go to the Created Date field, click the blue drop-down arrow, and select the type of date you want to search for (Figure 8). For example, select in between to search within a range of dates, then specify the start and end dates in the two calendar fields (Figure 9).

Figure 8. Date type options in the Created Date filter.
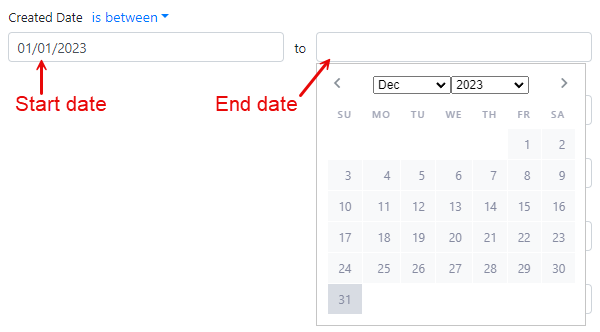
Figure 9. Specifying start and end dates in the Created Date filter.
NOTE: All date fields provide the same options and work the same way as the Created Date field.
Products
To see cases that involve one or more defective products (e.g., drugs, devices, toxic torts, etc.) that are alleged to have caused the client’s injury or condition, click the Products field and select any number of products (Figure 10). Optionally, click the blue drop-down arrow and choose an option for including or excluding the selected products in the search results. You can include or exclude any or all of the selected products (Figure 11), as described previously in Filtering Options.

Figure 10. Filtering for cases based on products involved in the litigation.
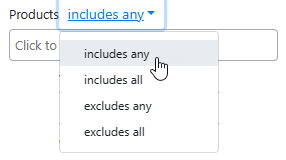
Figure 11. Including or excluding your selections from the Products filter.
Conditions
To view cases involving one or more specific physical conditions, click the Conditions field (Figure 12) and select any number of conditions resulting from harmful products or disputed matters (e.g., adverse effects, toxic exposure, injury, or illness). Optionally, click the blue drop-down arrow and choose an option for including or excluding the selected conditions in the search results. You can include or exclude any or all of the selected conditions, just like the Products filter.
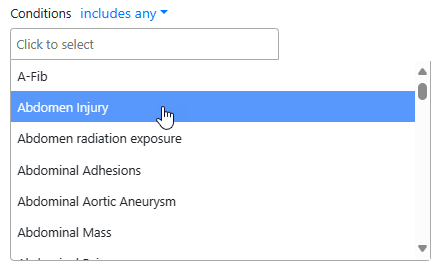
Figure 12. Filtering for cases based on one or more physical conditions
Information
To filter for cases that contain data in the Additional Information field (which appears on the Case Details tab), click the Information field and select any number of data points (Figure 13). The data points are additional key details relating to the matter, which are not dates, products, or conditions. The field is populated with a variety of information types, such as amounts of loss, type of event, ethnicity, number of incidents, and so on. Optionally, click the blue drop-down arrow and choose an option for including or excluding the selected data in the search results, as previously described in Filtering Options.
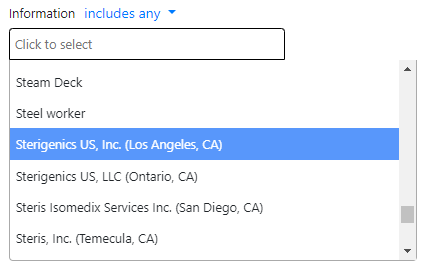
Figure 13. Specifying data points in the Information filter.
State Injured
To view cases where the injury occurred in a specific state, click the State Injured field select a state. This field works exactly like the State field, as shown previously in Figure 7. Optionally, click the blue drop-down arrow and choose an option for including or excluding the selected data in the search results, as previously described in Filtering Options.
Injury Date
Date of injury is a key data point in any personal injury case, and this date should be added to the case details as early as possible in the intake process. To filter for cases according to the date when the injury occurred, go to the Injury Date field, click the blue drop-down arrow, and select the type of date you want to search for. For example, select in between to search within a range of dates, then specify the start and end dates in the two calendar fields. This field works exactly like the Created Date field, as shown previously in Figures 8 and 9.
Documents
Your firm can use SimplyConvert to send a variety of legal documents to clients for review and digital signing, as described in Sharing Documents with a Client. As case-related documents are sent to a client’s portal, the documents and their current statuses are logged on the Files tab in SimplyConvert. To view cases according to the type of documents that have been sent, click the Documents field, and select any number of document types and statuses (Figure 14).
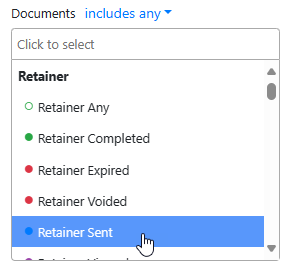
Figure 14. Filtering cases on the types of documents sent to clients.
Documents are categorized by these types:
- Retainer
- HIPAA
- HITECH
- Secondary
- Medical Individual
- Medical Organization
- Client Uploads
Each type of document has a current status, which changes over the document’s life in the system:
- Sent
- Viewed
- Voided
- Expired
- Completed
After selecting documents, you can optionally click the blue drop-down arrow and choose an option for including or excluding the selected data in the search results, as previously described in Filtering Options.
For more information about the SimplyConvert client portal, see Understanding the Client Portal.
Campaigns
To filter for cases that were engaged as the result of an advertising campaign, click the Campaigns field and select a campaign (Figure 15). If the case was part of a campaign, a tag for the campaign will be in the list. Optionally, click the blue drop-down arrow and choose an option for including or excluding the selected campaign in the search results.
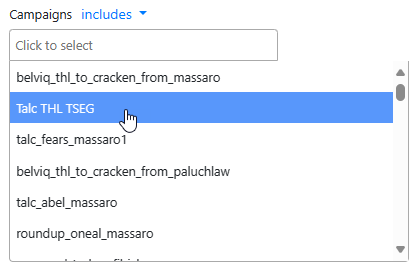
Figure 15. Filtering cases by campaign.
NOTES: Campaign tags can also be used to enable one firm to see another firm’s cases, which is important if the firms are sharing cases. To allow this, the two firms create a campaign tag that gets added to the Campaigns field.
Over time, Campaign tags may stop corresponding directly with an advertised campaign. Tags may also be used to share cases, to mark specific actions needed, and organic tags that some firms request. For more information on the way SimplyConvert tags are used in your firm, consult with your system administrator.
Referred From
To view cases that have been referred to your firm from another firm, click the Referred From field and select one or more referring firms (Figure 16). Optionally, click the blue drop-down arrow and choose an option for including or excluding the selected firm in the search results.
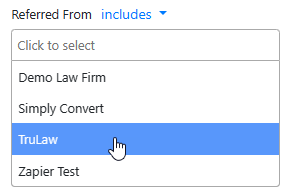
Figure 16. Filtering cases by their referring firm.
Referred To
To view cases that your firm has referred to another firm, click the Referred To field and select one or more firms. This field works exactly like the Referred From field, shown previously in Figure 16.
Signed Date
To view cases according to the date the client signed a retainer agreement with your firm, go to the Signed Date field, click the blue drop-down arrow, and select the type of date you want to search for. For example, select in between to search within a range of dates, then specify the start and end dates in the two calendar fields. This field works exactly like the Created Date field, shown previously in Figures 8 and 9.
Lead Type
Cases can be added to SimplyConvert in several ways. To search for cases according to the way they entered the system, click the Lead Type field to open its drop-down list (Figure 17). Then select one or more of the following options:
- Bot. The lead was acquired through the bot (via chat, a landing page, or the manual intake bot).
- Call. The lead was acquired from an inbound phone call.
- Email. The lead was acquired from email marketing.
- API. The lead was inserted via the SimplyConvert API, which your firm can use to push cases to SimplyConvert from your intake system or case management system. When a case is pushed to SimplyConvert, the system automatically marks it as an API case.
- Unknown. The lead was acquired through an unknown intake type.
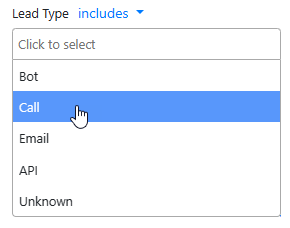
Figure 17. Filtering cases based on their lead type.
Optionally, click the blue drop-down arrow and click includes to show only cases that entered the system in the selected manner, or click excludes to show cases that entered the system in any other way.
Portal Status
To find cases according to their status on the client portal, click the Portal Status field and select one or more statuses (Figure 18). The statuses stand for the work that the client has done or has yet to do within their portal. The statuses are useful in flagging the various stages of data collection that clients are in.
The portal statuses include:
- Complete. The client has submitted all documents and/or completed required tasks.
- Incomplete. There are outstanding documents to be submitted and/or tasks to be completed.
- Failed Review. The information submitted by the client failed a “Quality Assurance” check. This applies when “Follow Up” services are active.
- Paused. The document completion process is on hold.
- Review. All required information has been submitted by the client and the data is ready for a “Quality Assurance” check. This applies when “Follow Up” services are active.
Optionally, click the blue drop-down arrow and click includes to show only cases with the selected portal status, or click excludes to show cases with any other status.
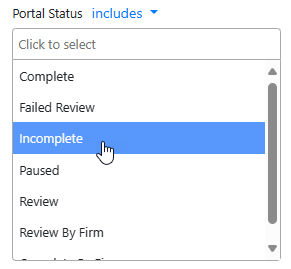
Figure 18. Filtering cases based on the status of the client’s work on the client portal.
Last Contact Type
To filter cases according to the way your firm last contacted the client, click the Last Contact Type field and select one or more contact types (Figure 19). The default options are Call, Email, and SMS Message (text message). Optionally, click the blue drop-down arrow and click includes to show only cases with the selected contact type, or click excludes to show cases with any other contact type.
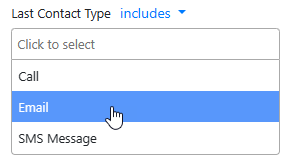
Figure 19. Filtering cases by the last contact method used to reach the client.
Last Contact Status
To view cases according to the status of your last client contact, click the Last Contact Status field and select one or more statuses (Figure 20). Optionally, click the blue drop-down arrow and click includes to show only cases with that contact status, or click excludes to show cases with any other contact status.
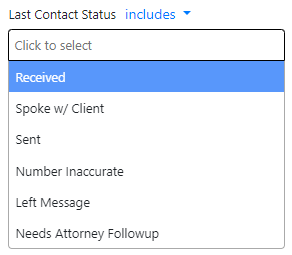
Figure 20. Options for the Last Contact Status filter.
Completed Date
To view completed cases according to their completion date, go to the Completed Date field, click the blue drop-down arrow, and select the type of date you want to search for. For example, select in between to search within a range of dates, then specify the start and end dates in the two calendar fields. This field works exactly like the Created Date field, shown previously in Figures 8 and 9.
Reporting Tags
If your firm uses tags to help with reporting cases, click the Reporting Tags field and select one or more tags (Figure 21). Optionally, you can click the blue-drop-down arrow and click includes to show only cases with the tags or click excludes to see cases without them.
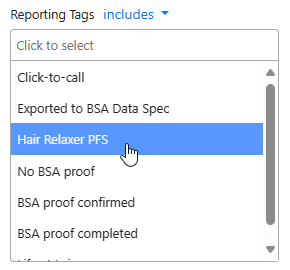
Figure 21. Filtering for cases that have been assigned a reporting tag.
NOTE: Reporting tags are used for reporting purposes only, and do not appear in any of the columns of the Cases page.
Contact Method
Many clients have a preferred method of communicating with their attorney, and it is best practice to know and use that method. To view cases based on the client’s preferred method for making contact, click the Contact Method field and select one or more methods. The default options are Email, Mail, Phone, and Text. Optionally, click the blue-drop down arrow and click includes to show only cases with that contact method, or click excludes to show cases with any other contact methods.
Mailing Status
If you have mailed a printed document to one or more clients, you can use the Mailing Status field to view cases based on the status of the hard copy (Figure 22). Click the Mailing Status field and select one or more statuses. Optionally, click the blue drop-down arrow and click includes to show only cases with the status, or click excludes to show cases with any other mailing statuses.
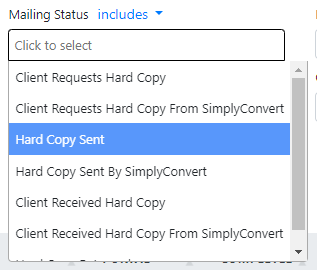
Figure 22. Options for the Mailing Status filter.
NOTE: For more information on sending and tracking client documents in SimplyConvert, see Sharing Documents with a Client.
Mailing Date
To view cases according to the date when their last mailing went out, go to the Mailing Date field, click the blue drop-down arrow, and select the type of date you want to search for. For example, select in between to search within a range of dates, then specify the start and end dates in the two calendar fields. This field works exactly like the Created Date field, shown previously in Figures 8 and 9.
Closed Date
To find closed cases according to the date when they were marked as closed in the system, go to the Closed Date field, click the blue drop-down arrow, and select the type of date you want to search for. For example, select in between to search within a range of dates, then specify the start and end dates in the two calendar fields. This field works exactly like the Created Date field, shown previously in Figures 8 and 9.
Options That Affect All Filters
At the bottom-left of the Filters panel is a set of options (Figure 23) that affect all your filtering choices. You can select and deselect any of these options and your choices apply no matter which filters you select for viewing cases.

Figure 23. These options affect all filters.
These options include the following:
- Referral Status. Select any or all of these options to include cases with specific referral statuses. These options apply to cases your firm has referred to other firms, not cases that have been referred to your firm. For example, if you want to see only referred cases that have been accepted, select Accepted and clear the other options.
- Lead Rank. In SimplyConvert, each lead can be ranked according to its likelihood of becoming a viable case with a positive outcome for the client. The rankings run from best (1) to worst (3), and some cases may not be ranked at all. To view all cases that match your filters regardless of their rank, leave all the options selected. To see only cases with a given rank, select that rank and deselect the others.
- Show Duplicates. If any cases have been duplicated in the system, selecting this option will show them in the filtered results.
- Show Dual Represented. If any clients are being represented by multiple firms, selecting this option will show them in the filtered results.
- Reset filters. When you are finished using a set of filters, click this link to clear all your choices so you can start over. (Alternatively, you can save a set of selected filtering options to be used again. See Saving Your Filters for more information.)
- Show # entries. Use this tool to specify the maximum number of cases you want to see in your filtered results. The options are 100, 500, and 1000
- Exclude archives. This drop-down list lets you include or exclude archived cases in your filter results, or to show only archived cases.
- Include referrals. Use this drop-down list to include or exclude referred cases in your filter results, or to show only referred cases.
- Exclude abandoned leads. If your firm has abandoned any leads stored in SimplyConvert, you can use this list to include or exclude them in your filter results. You can also show only abandoned leads.
- Ignore verification. This list (Figure 24) lets you view cases according to the manner in which they have been verified, or if they haven’t been verified at all.
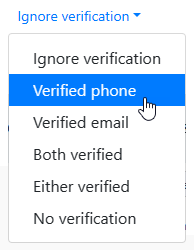
Figure 24. Options for viewing cases with a given type of verification, or no verification at all.
Saving Your Filters
When you have selected a set of filtering criteria and options for viewing cases, you can save the set and give it a name. This way you can simply choose its name from a list of saved filters instead of reselecting the options from scratch. Here’s how:
- Select all the filtering criteria and options you need to view the desired cases.
- At the bottom-right corner of the Filters panel, click Saved Filters. The Saved filters dialog box opens (Figure 25). You can use the dialog box to open a previously saved filter or to save a new filter.
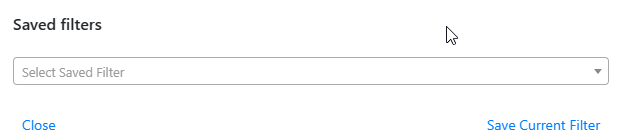
Figure 25. This dialog box lets you save a newly configured filter and quickly re-use a previously saved filter.
- Click Save Current Filter. The Save current filter dialog box opens (Figure 26), with all the options you need to save, name, and describe your new filter.
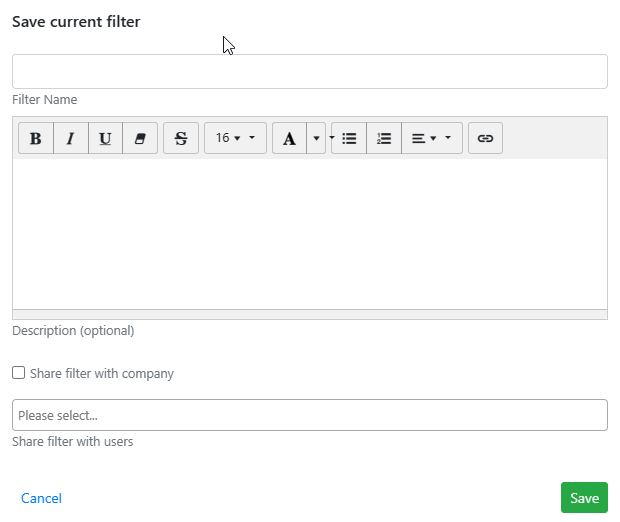
Figure 26. Naming and adding other attributes to a filter as it’s being saved.
- Click the Filter Name box and type a name for the filter. Make sure the name is brief but descriptive enough to tell you what this filter is when you look for it in the future.
- (Optional) Click the Description box and type a fuller description of the filter. This information can be helpful when you build up a long list of saved filters.
- If you want to share the new filter with other users in your firm, click the Share filter with company checkbox.
- If you want to share the filter only with specific people in your firm, click the Share filter with users box and select a user. You can select multiple users.
- Click the Save button to save the named filter.
Using a Saved Filter
Take the following steps to use a filter that you have saved or someone else has shared with you or your entire firm:
- Click the Saved Filters button.
- When the Saved filters dialog box opens, click the Select Saved Filter drop-down arrow and select a filter from the list (Figure 27). The filter’s options are immediately applied in the Filters Panel and the list of cases is updated with matching cases.
The Saved filters dialog box does not close at this point. Rather, it remains open so you can click Filter Options (Figure 28) and possibly update the filter as described in the following sections.
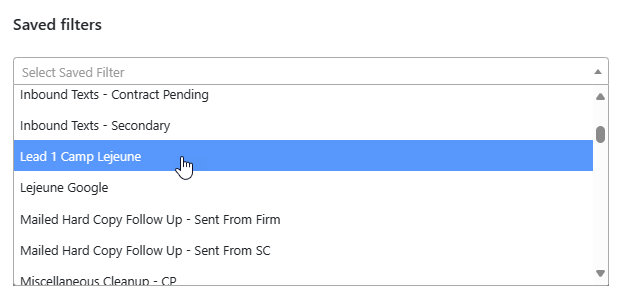
Figure 27. Selecting a saved filter to use again.

Figure 28. The Filter Options button appears after you select a saved filter.
Updating a Filter That You Own
When you save a new filter, you are considered to be that filter’s owner, so you can make changes to it or delete it. When you select that filter in the Saved Filters dialog box and click Filter Options (shown previously in Figure 28), the dialog box displays all the options for modifying the filter (Figure 29). These options are still available to you even if you have shared the filter with other users in your firm.
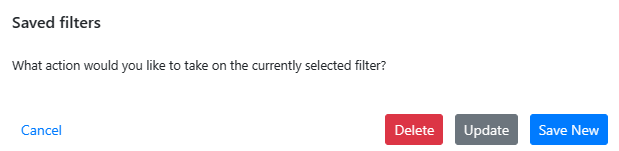
Figure 29. Options for modifying a saved filter that you own.
Click one of the following options, depending on what you want to do with the filter:
- Delete. Removes the filter from the list of saved filters.
- Update. Enables you to make changes to the saved filter. The Save Current Filter dialog box appears again (shown previously in Figure 26), so you can rename the filter, update its description, or share it with the company or different people.
- Save New. Saves a copy of the filter, so you can make changes to it without altering the original filter.
Updating a Filter That You Do Not Own
If you did not create a saved filter, you cannot delete or update it, as shown in Figure 30. Only the Save New option is available to you.
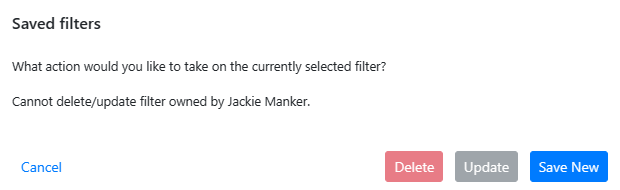
Figure 30. Options for modifying a saved filter that was created by another user.
Viewing and Hiding Columns in the Case List
By default, the Cases page displays a given set of columns in the case list. If you want to see certain columns and hide others, you can customize the view. One way to start this process is by clicking the Column Presets button, then clicking either All Columns or Deselect All Columns (Figure 31).
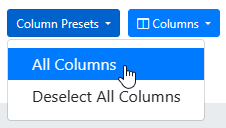
Figure 31. Turning on the display of all columns in the case list, using the Column Presets button.
If you select All Columns, the case list updates to display all of the nearly 50 available columns. This makes the case list too wide to fit a screen, so you need to scroll right and left to view all the columns. Conversely, if you click Deselect All Columns, SimplyConvert hides all the currently visible columns, so the case list appears empty.
NOTE: It isn’t necessary to use the Column Presets button before customizing the case list. You can simply use the Columns button, as described next.
No matter how many columns are currently visible, you can customize the view by clicking the Columns button. This opens a list of all the available columns (Figure 32). Deselect the ones you want to hide and select the ones you want to see.
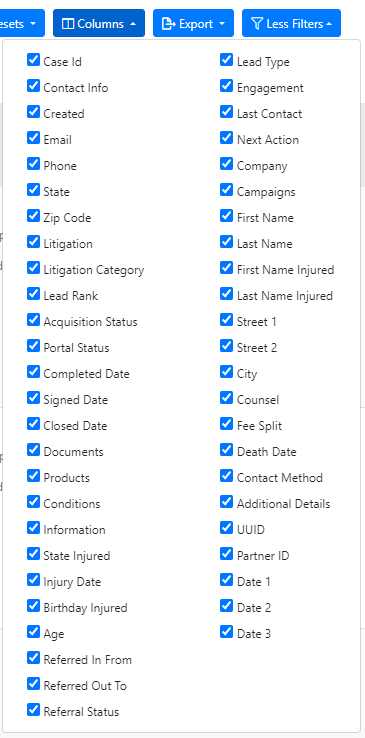
Figure 32. Using the Columns button to show and hide columns. Here, all the available columns are selected so they appear in the case list.
Exporting Selected Cases
SimplyConvert can export all the data for selected cases to a comma-separated value (CSV) file, which you can then view and edit in an external program, such as a spreadsheet or text editor.
Start by filtering the cases to show the kinds of cases you want to export, for example, cases from a given litigation with an acquisition status of Contract Pending.
NOTE: Although filtering is optional before exporting, it can be very helpful in pulling only cases that meet your criteria. This is useful when you have a large number of cases in the list.
Selecting Cases to Include in an Export
To select the cases to include in your export, do one of the following:
- To select all the cases in the list, click the drop-down arrow next to the checkbox in the column heading (to the left of the ID column heading), and click Select all results (Figure 33).
- To select the cases on the current page of the list, click the drop-down arrow next to the checkbox in the column heading (to the left of the ID column heading), and click Select this page only.
- To select individual cases, scroll through the case list and click the selection checkbox at the left end of each case you want to export (Figure 34).
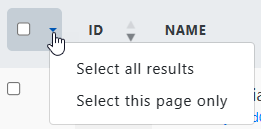
Figure 33. The blank checkbox in the header row lets you select all cases in the list, or just the cases on the current page.
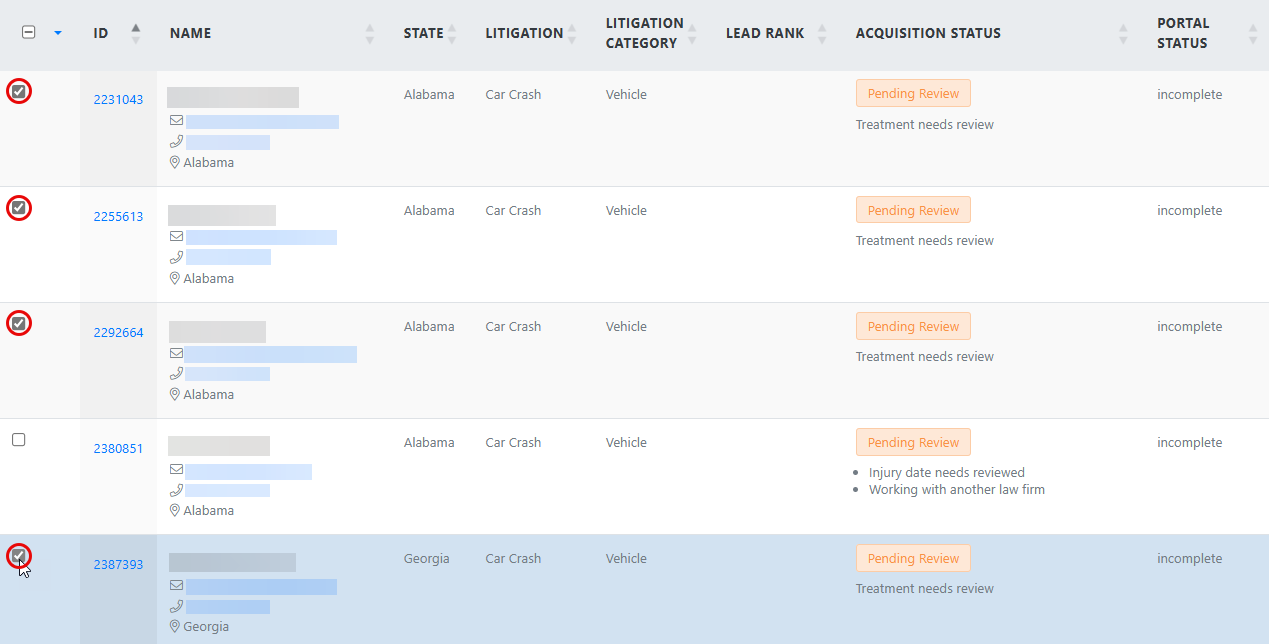
Figure 34. Selecting individual cases for export.
NOTE: By selecting cases as described here, you can perform other kinds of actions on them, as described in Performing Bulk Actions on Selected Cases.
Exporting the Selected Cases
- Click the Export button, then click CSV (Figure 35). A message appears at the top of the screen (Figure 36), telling you the export is in progress and that you will receive an email notification when the exported file is ready to download (Figure 37).
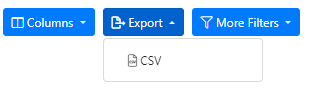
Figure 35. Starting the export.
![]()
Figure 36. The notification that your export is in progress.
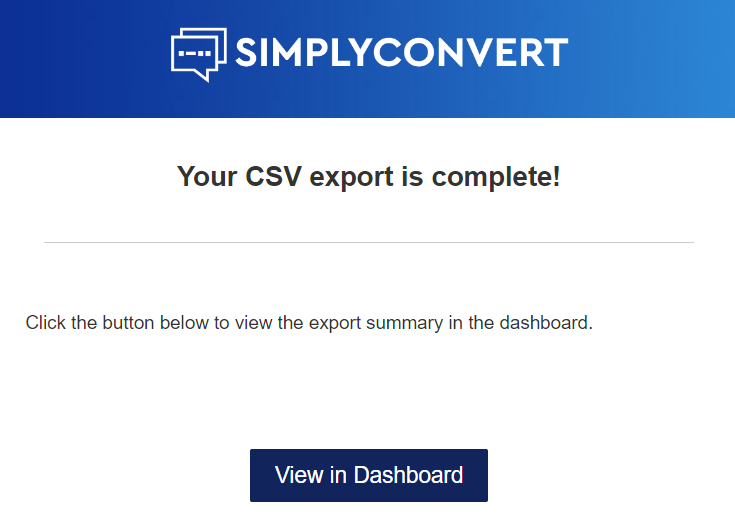
Figure 37. The email message, shown in Gmail.
- In the email message, click the View in Dashboard button. Alternatively, you can click the export status link in the message shown in Figure 36. Either way, the Export History window opens in SimplyConvert. Your new export should appear at the top of the list (Figure 38); if not, you can identify your export by checking the User and Created Date columns.
- Click the hyperlink in the Click To Download Your File column. The exported file is copied to your computer’s designated folder for downloads.

Figure 38. The Export History window.
NOTE: You can make edits to the data in an exported CSV file, but your changes will not automatically appear in SimplyConvert. However, your system administrator has access to tools that can import the edited data back into the system. See your system administrator for more information.
Performing Bulk Actions on Selected Cases
Just above the case list and on the left side of the Cases page is the Actions button (Figure 39). Clicking this button reveals actions that you can apply to a group of selected cases, all at the same time. The Actions button frees you from performing certain actions on cases one at a time.
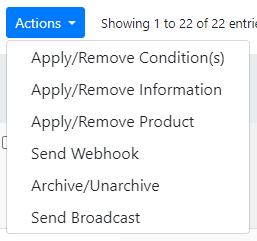
Figure 39. These actions can be applied in bulk to selected cases.
To apply any of the actions, select a group of cases (again, filtering the case listing is optional but may be helpful), click the Actions button, then click the desired action:
- Apply/Remove Condition(s). This action enables you to apply conditions to or remove conditions from selected cases. For example, you can add the condition Prostate Cancer to the selected cases.
- Apply/Remove Information. This action lets you apply Information field values to or remove Information field values from selected cases. For example, you can remove “working with another lawyer” from the selected cases.
- Apply/Remove Product. Use this action to add products to or remove products from the cases. For example, you can add Zantac to the selected cases.
- Send Webhook. This action lets you manually trigger a webhook for the selected cases.
- Archive/Unarchive. This action enables you to archive or unarchive cases in bulk. Archiving a case just removes it from the default view when cases are loaded in the case list. Unarchiving returns the cases to the default view.
- Send Broadcast. Applying this action launches the bulk emailer, so you can create and send a templated email message to the clients associated with the selected cases.
NOTE: Your firm’s Actions list may also display an Export to CRM option, which exports case data in bulk (up to 100 cases at a time) to your firm’s CRM application. The application must be integrated with SimplyConvert in order for this action to be activated.