Whenever an action is taken on a case, or whenever a change is made to information about a case, SimplyConvert summarizes the activity in a note and automatically adds it to the Notes tab. In addition to viewing, editing, and removing the automated notes, you can create new notes of your own.
All kinds of activity are automatically recorded in notes—everything from a change to the client’s contact information, to the sending of a text or email message, to the exchange of documents, to changes to a contract’s status. A lot of notes can be created over a case’s life, so it may be necessary to eliminate some notes occasionally so only the most important ones remain in the list.
Take the following steps to open the Notes tab:
- Open the Cases page.
- Filter the client list as needed, as described in Using Filters to View Your Cases.
- Find the case you’re looking for and click its row in the case list. The case opens and the case information tabs appear on the left.
- Click the Notes tab (Figure 1). Notes are listed in order from newest to oldest.
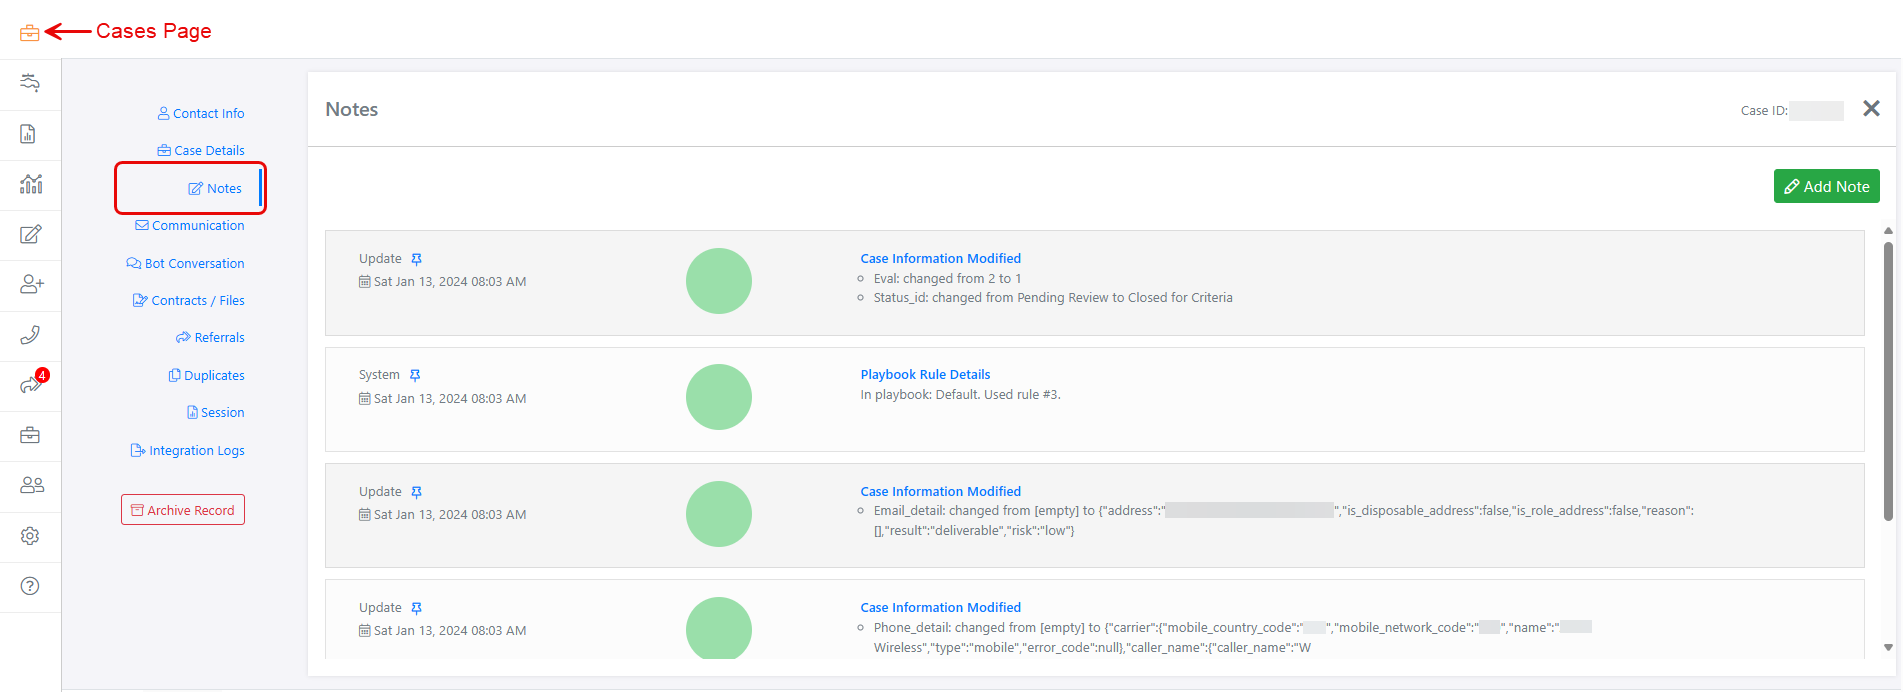
Figure 1. The Notes tab, displaying notes about a case. (Some data is blurred for privacy.)
NOTE: There is no Save Changes button at the bottom of the Notes tab. When you add or edit a note, you save your changes in the dialog box that opens to hold your work.
Modifying an Existing Note
You can make the following kinds of changes to an existing note:
- Pin a note to the top of the list or unpin it to return the note to its original position.
- Edit a note’s content.
- Delete a note.
Pinning and Unpinning a Note
By default, notes appear in reverse chronological order (newest to oldest) in the list of notes, but you can pin one or more notes to the top of the list to ensure they remain there. This lets you keep the most important notes visible all the time.
Here’s how to pin a note:
- On the Notes tab, look for the push-pin icon at the left end of the note (Figure 2). When the icon appears hollow, the note has not been pinned.

Figure 2. The push-pin icon appears hollow when the note has not been pinned.
- To pin the note to the top of the list, click its push-pin icon. The next time you open the Notes tab, the note will be at the top of the list and the icon will appear filled (Figure 3).

Figure 3. The note is now pinned to the top of the Notes list, and the push-pin icon appears filled.
- To unpin a note from the top of the list, click its push-pin icon again. The next time you open the Notes tab, the note will appear at its original position and the icon will appear hollow.
NOTE: Notes cannot be dragged from one place in the list to another.
Editing a Note’s Content
You can easily revise a note’s content, as follows:
- Locate the note you want to edit and click its title (Figure 4). The Note dialog box opens (Figure 5).

Figure 4. The note’s title is a hyperlink that opens the Note dialog box.
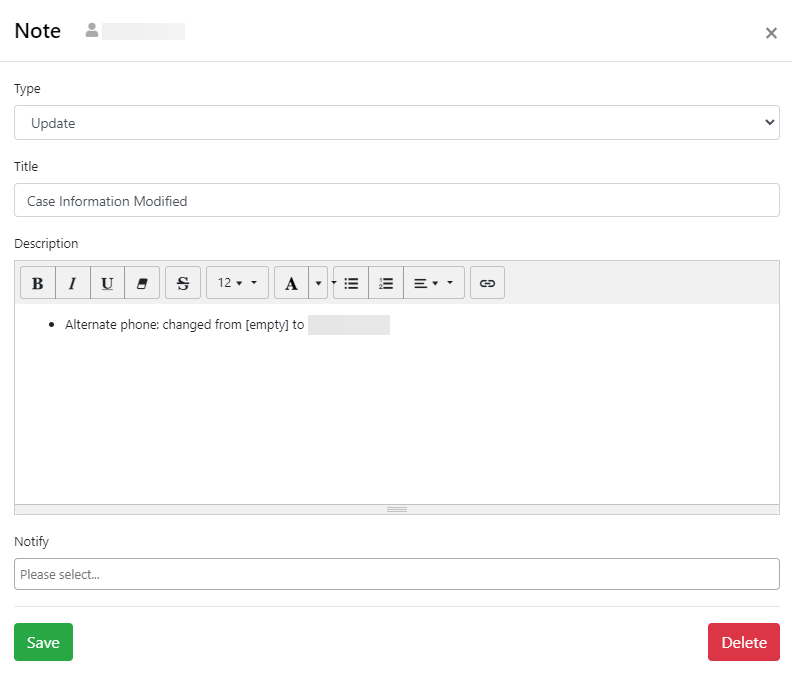
Figure 5. You can edit a note’s content in the Note dialog box.
- Notes are categorized by type—a term that describes the note’s purpose. To choose a different one, click the Type drop-down arrow and select the type that best describes the note (Figure 6). Many automated notes are assigned the “Update” type by default.
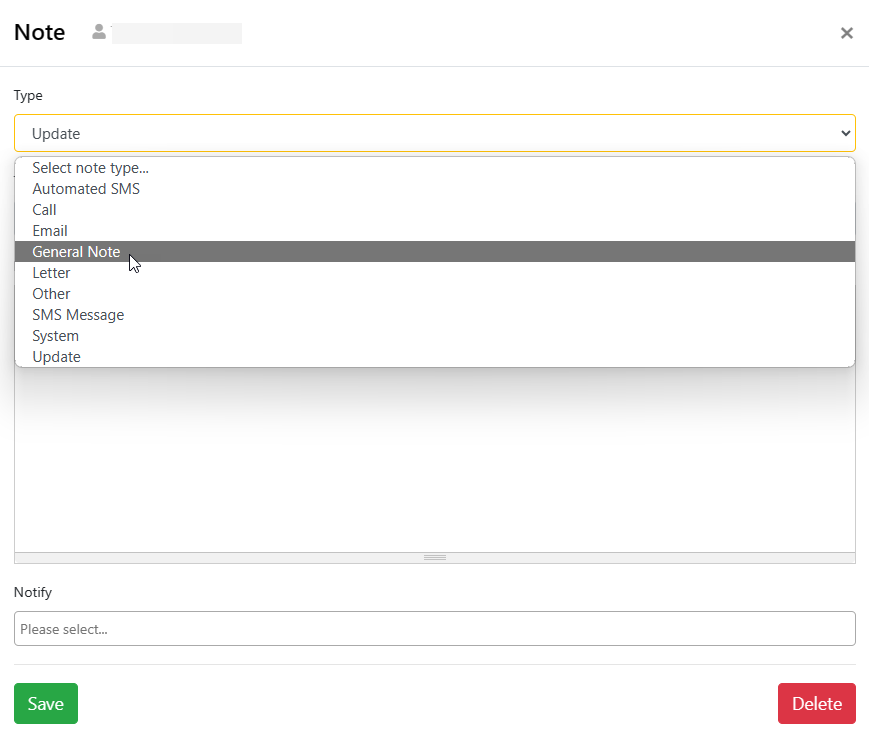
Figure 6. Specifying the note’s type.
- To change the note’s title, click the Title field, select the current title, and edit it.
NOTE: You cannot save your changes without a note type or title in their respective fields.
- To edit the note’s description, click the Description box and add or edit text. In the note shown in Figure 5, for example, you might add information about the alternate phone number, explaining what kind of number it is (office, mobile, spouse, etc.) and the best time of day to use it. The toolbar at the top of the Description box lets you format the text and insert hyperlinks.
- If you want someone at your firm to receive an email notification of the changes you make to the note, click the Notify field and select the person’s name (Figure 7). Click the field again to select another name.

Figure 7. Selecting colleagues to receive a notification of your changes to the note.
- Click Save to save your changes and close the Note dialog box.
Deleting a Note
If a case’s list of notes becomes unmanageably long, you can delete unneeded ones. Notes cannot be archived separately from the case. When you delete a note, it is not hidden or archived; it is gone forever.
Here’s how to delete a note:
- Locate the note you want to delete, then click its title (Figure 8). The Note dialog box opens (Figure 9).

Figure 8. The note’s title is a hyperlink that opens the Note dialog box.
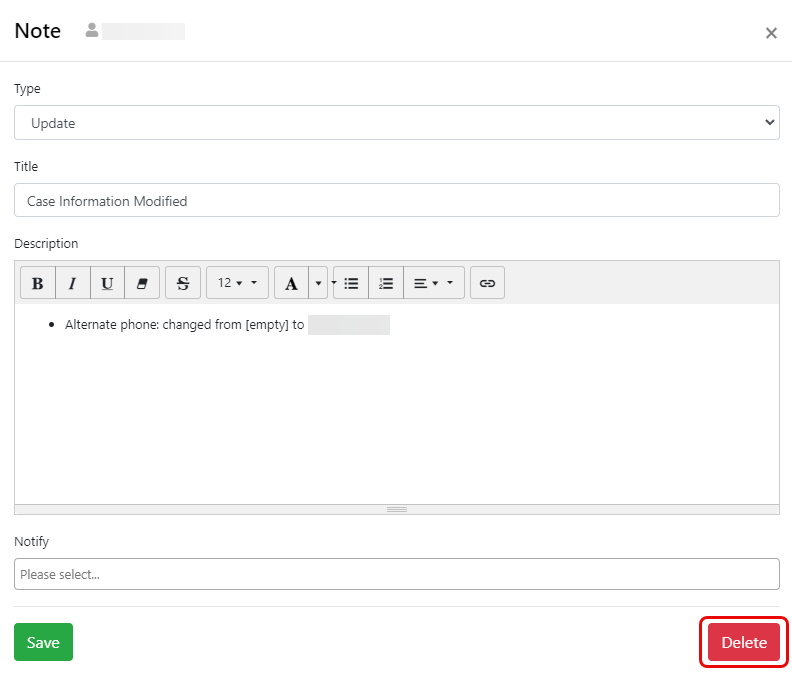
Figure 9. The Note dialog box lets you delete the note.
- In the lower-right corner of the dialog box, click the Delete button. A warning message appears in the dialog box, telling you that the deletion cannot be undone (Figure 10).

Figure 10. Confirming the note’s deletion.
- If you are not sure that you want to delete the note, click Cancel (the dialog box remains open). If you are sure, click Confirm Delete to remove the note from the list.
Adding a New Note
You can add as many new notes to a case as you like. Take the following steps to create a note:
- On the Notes tab, click Add Note (Figure 11). The Note dialog box opens (Figure 12).
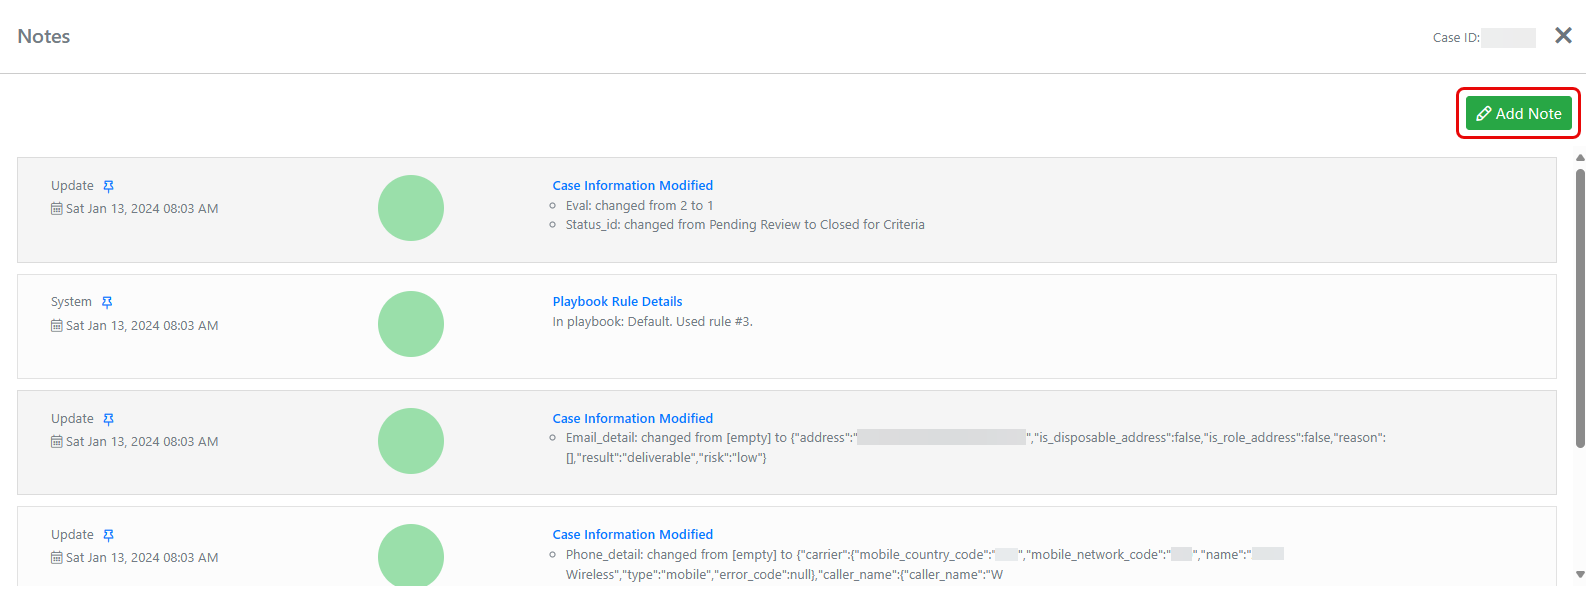
Figure 11. The Add Note button on the Notes tab.
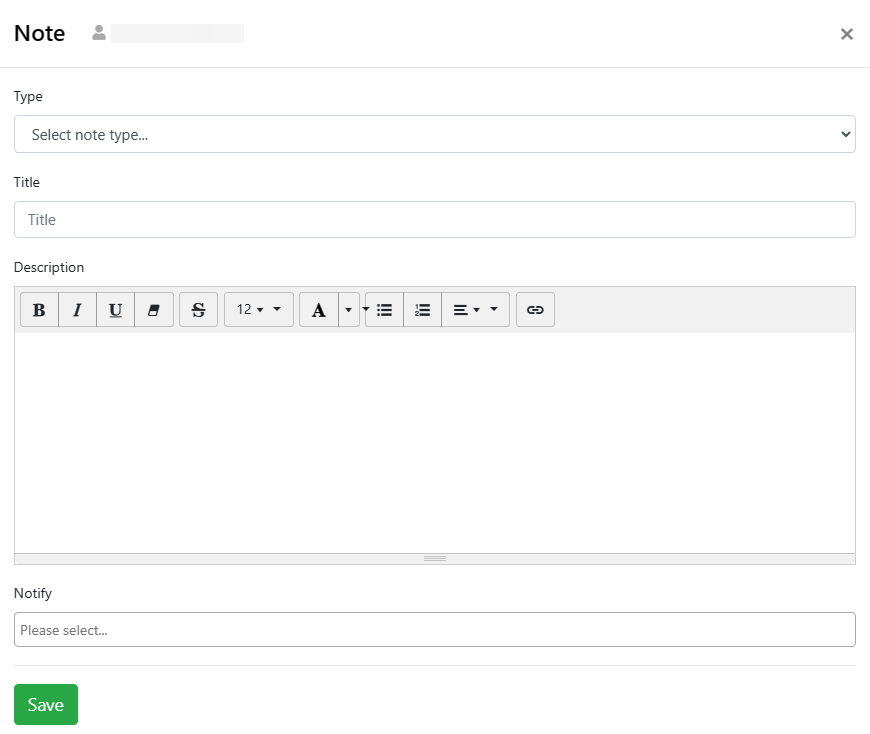
Figure 12. The Note dialog box lets you create a new note.
- Click the Type drop-down arrow and select the type that best matches the note’s purpose (Figure 13). For example, if you are simply updating case information, the “Update” type might be appropriate.
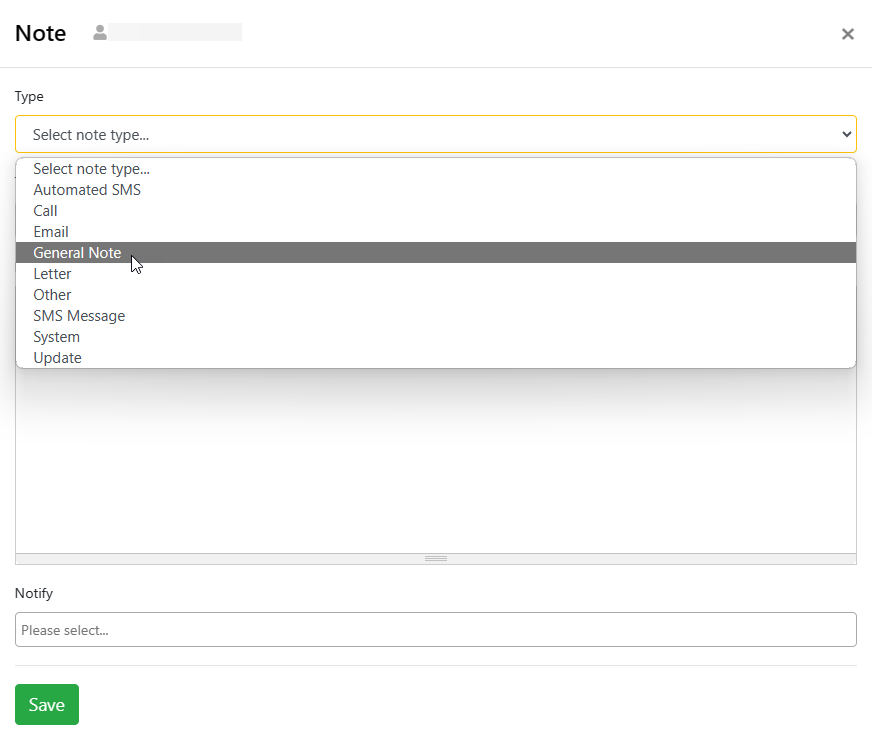
Figure 13. Specifying the note’s type.
- Click the Title field and give the note a short but descriptive title.
NOTE: You cannot save the new note without a type or title in their respective fields.
- Click the Description box and enter text that explains the action you have taken on the case. The field is free form so you can enter any text you like. The toolbar at the top of the Description box lets you format the text and insert hyperlinks.
- If you want someone at your firm to receive an email notification about your new note, click the Notify field and select the person’s name (Figure 14). Click the field again to select another name.
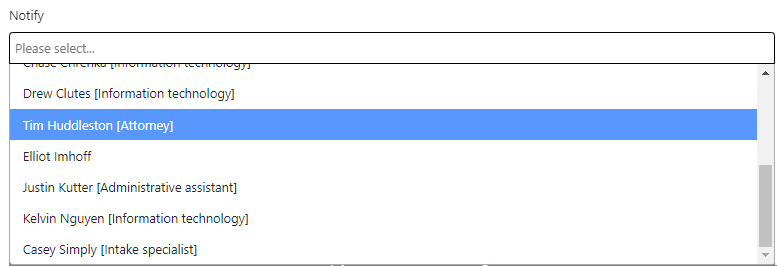
Figure 14. Selecting colleagues to receive a notification of your new note.
- Click Save to save your changes and close the Note dialog box.
NOTE: After your new note is saved, you can make changes to it like any other note, as described above in Modifying an Existing Note.